Microphone Shootout - Immersive Spaced Array

ORTF Stereo Pairs Neumann KM 184, Schoeps MK 41, Sennheiser MKH 50

The setup - three ORTF stereo pairs.

Intent

We’re working on expanding our immersive audio recording capabilities, particularly in the realm of immersive music.  One of the ways we’re looking to expand is into spaced microphone arrays.  Everything Blackguard Sound has commercially released up to this point has been recorded with coincident arrays (1st or 2nd Order Ambisonics).  There are many benefits to Ambisonics, but there are some tradeoffs, too.  We’re primarily concerned with the size of the sweet spot, which can be quite small.  Outside of that sweet spot phasing becomes apparent and it can feel a little dizzying.  We’re working on postproduction methods to decrease this effect, and the results are encouraging.  But one of the benefits of spaced arrays is a more stable, enlarged sweet spot.  That said, we will most likely continue to use Ambisonics mics for field recordings due to the obvious logistical challenges of bringing spaced arrays into the field.


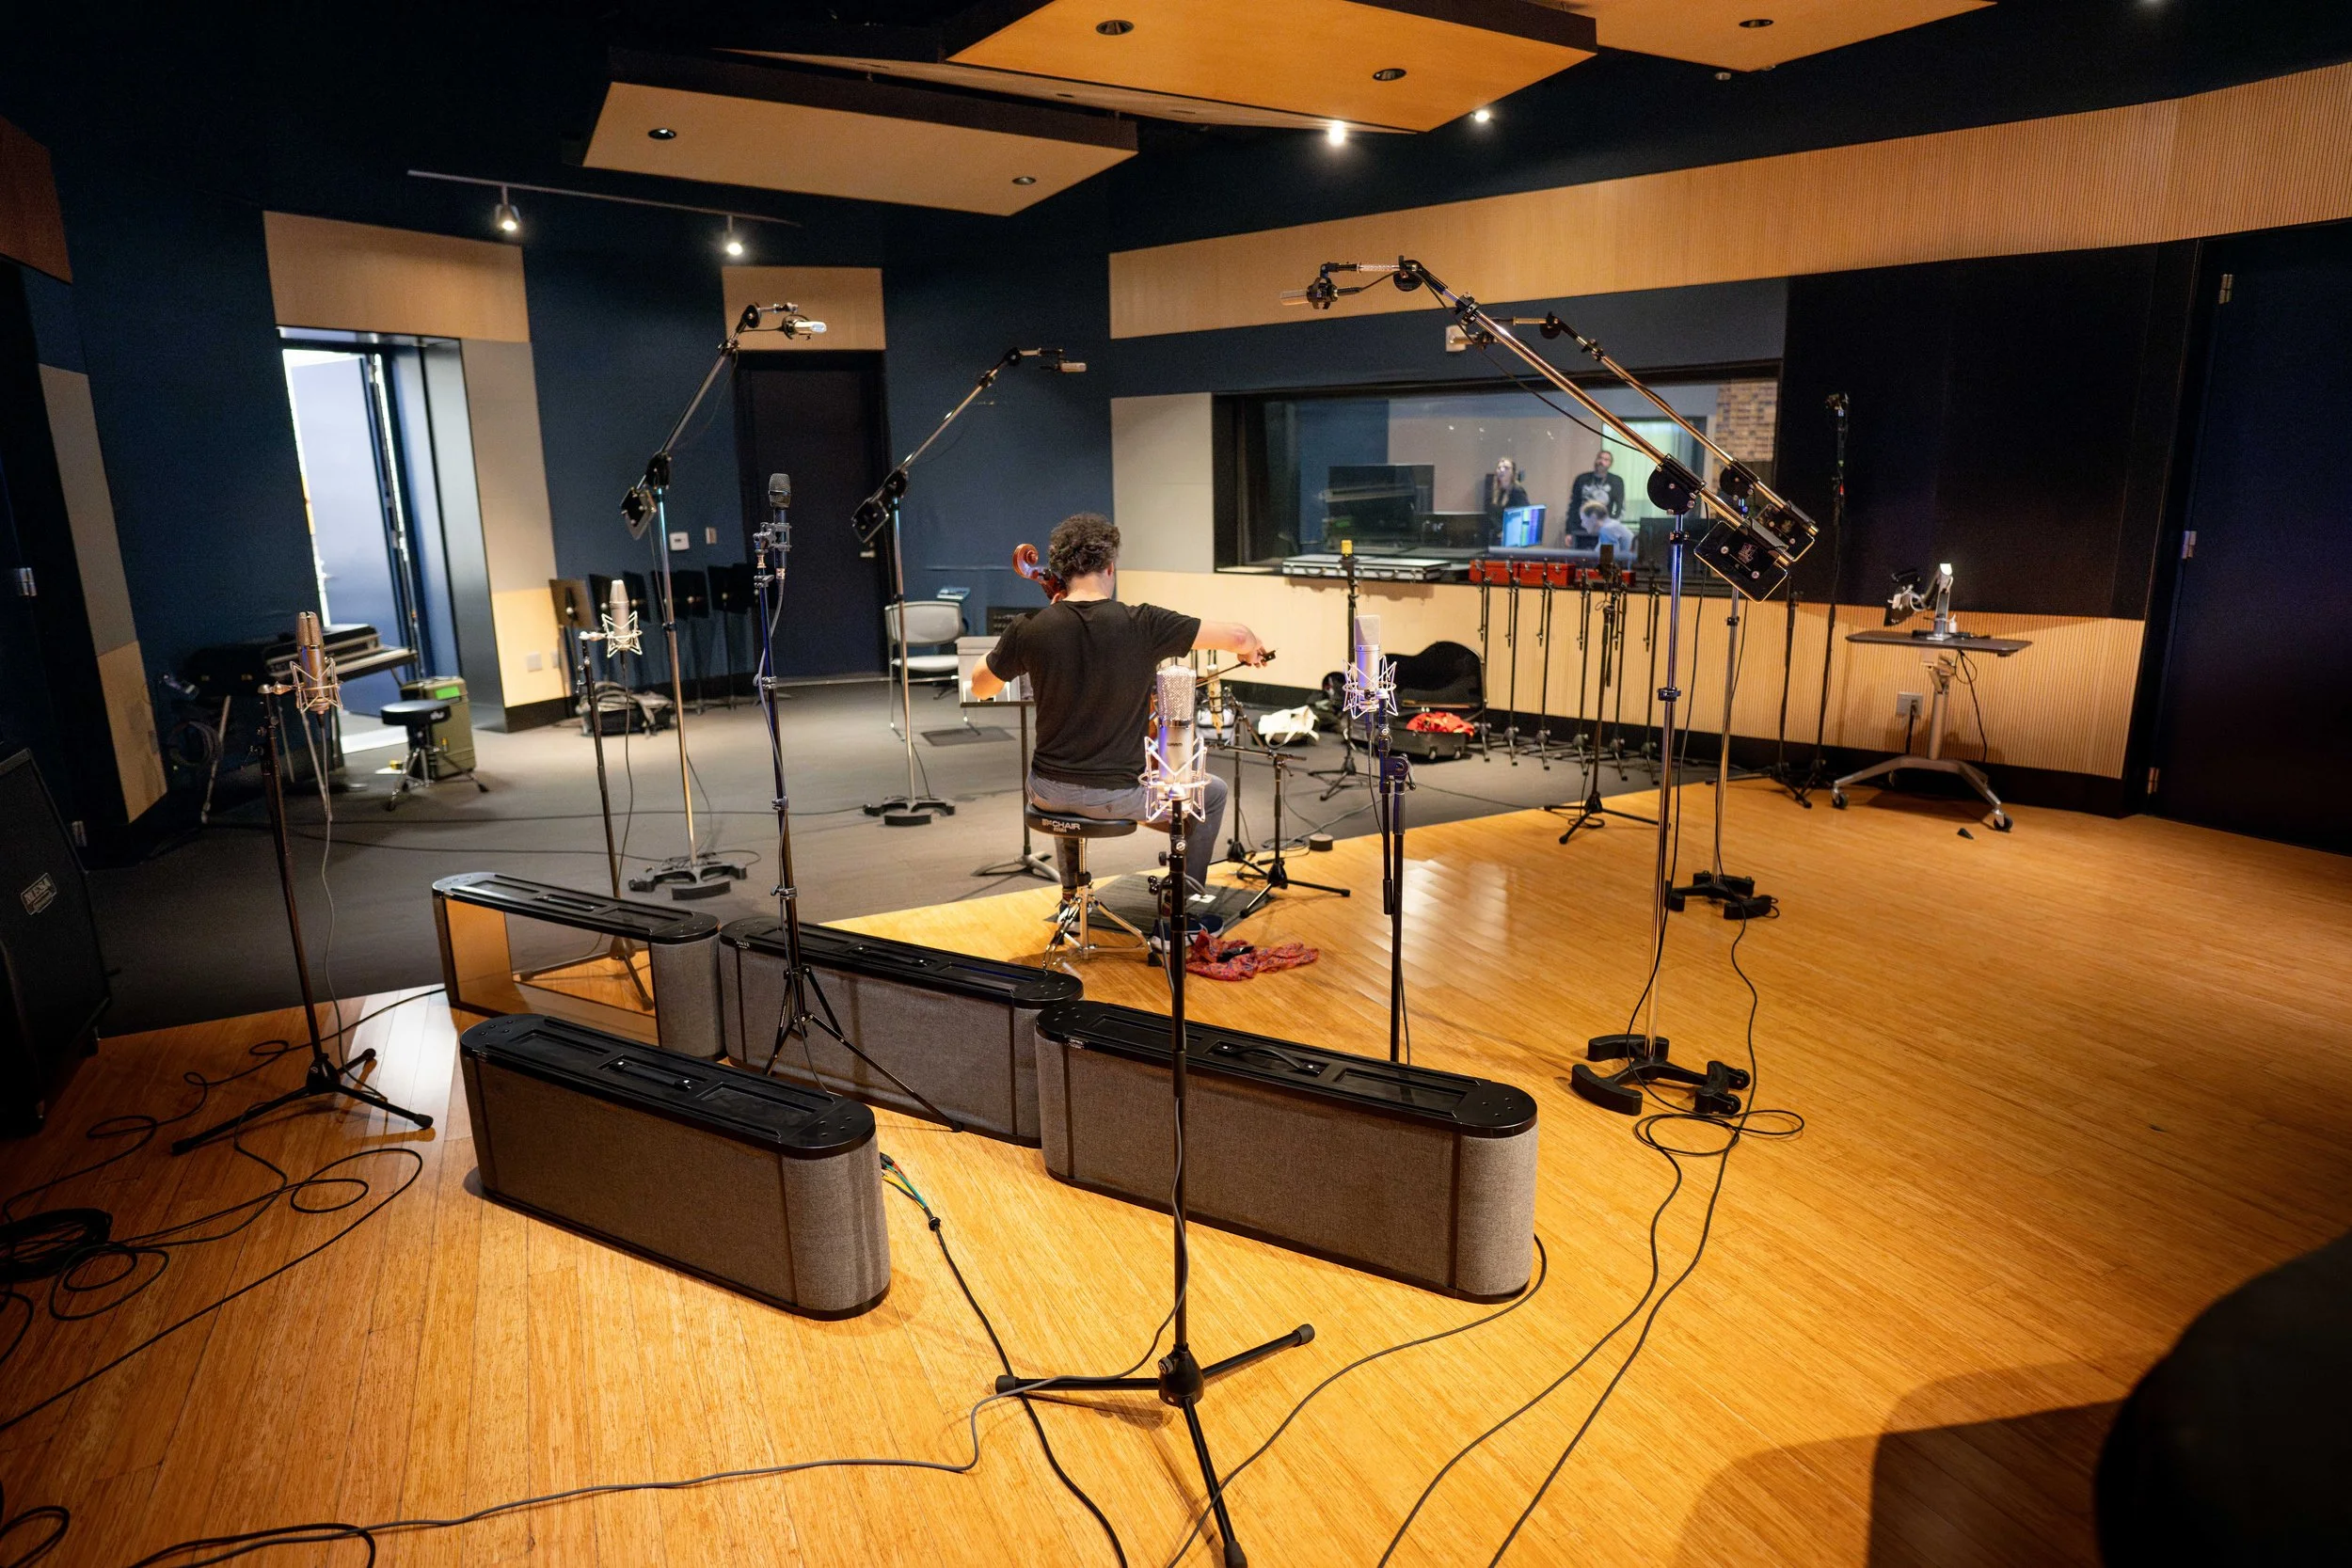
We’ve experimented in the past with quad spaced omni (with meh results) and a proprietary technique devised in conjunction with Darren Schneider at Full Sail University.  This novel technique places the performer(s) in the center of 11 microphones at the Dolby recommended Atmos speaker placements, pointed inwards.  Then in post, each mic is converted into a Dolby Atmos object and panned to its placement in the room.  The results of this experiment were more encouraging.  The immersive image is very high fidelity and interesting, but perhaps hyper-real.  It almost places the listener inside the instrument or inside the performer’s perspective.  We thought it was pretty cool, but the feedback from classical music aficionados was almost exclusively ‘I am not used to that perspective, and I don’t think I can get used to it’.  So, our research into spaced arrays continues. 

Immersive Microphone Technique at Full Sail University

The Full Sail immersive mic technique in action


One spaced array in particular has sparked our curiosity.  The PCMA-3D (Perspective Control Mic Array) by Dr. Hyunkook Lee.  It’s influenced by existing classical music recording techniques but enhanced to be compatible with immersive audio.  This technique requires eleven mics (a mix of cardioids and super cardioids) arranged in a one-meter square with seven mics on the horizontal plane and four aimed upwards (coincident with the four corners of the square).  Phase one of our spaced array journey will be testing.  Phase two will be purchase and adoption.  Buying eleven high-end microphones is a substantial investment, so we will be renting mics for our initial experiments.  But even renting is an expensive proposition. - it will cost about $1,700 to rent eleven high quality mics for a week!  So, with that in mind we devised this microphone shootout between the three front-runners in the hopes of narrowing down our options.


The Three Options


Schoeps MK 4 / MK 41

These are the mics to beat.  We have a stereo pair of MK 41s, and they are our favorite mics for sound effects recording.  They have an uncanny ability to capture the space of a room.  On headphones, it’s a borderline immersive experience.  I have been genuinely startled while editing under headphones when an off-axis sound seemed to come from behind me.  Since the goal here is maximum immersion, it’s going to be tough to beat this mic.  There are two downsides to these mics, however.  The first is expense.  These retail for $2,000 each.  Multiply that by eleven and we’re looking at the cost of a reasonable new car.  The second is their susceptibility to humidity.   As much as we love these mics, it’s just not possible to use them outdoors here in Florida (or any other sub-tropical or tropical climate).  As stated above, we’ll probably continue using Ambisonics mics in the field, but if we’re going to spend a crazy amount of money on mics, we’d prefer to have the option of using them outside.  We used the MK 41 (super cardioid pattern) for this test.


Sennheiser MKH 8040 / MKH 8050

We have tons of experience with Sennheiser mics.  The AMBEO is our go-to mic in the field, and we’ve used MKH 50s and MKH 60s recording dialog on countless film sets.  The 8040 and 8050 are updated versions of that older generation.  The 80 series is meant to be interchangeable with the older mics, but we’ve heard anecdotally that this isn’t entirely the case.  However, for the purposes of this test we’re using the older MKH 50 since that’s what we have access to.  This approach may prove the be flawed, but I suspect these mics are close enough to help with our decision.  The upside of the Sennheisers is that they are slightly more affordable at $1,500 each.  Also, they are RF condensers, so their high humidity performance is immaculate.  Even if we aren’t utilizing the full array, we can use these mics in the field for a variety of other applications.  We used the MKH 50 (super cardioid) for this test.


Neumann KM 184 / KM 185

These are the wild cards.  The KM 184 is well known in the music industry but not widely used in sound effects.  I have used the Neuman KMR-8 shotgun mic for dialog.  Like the Schoeps, it does not deal well with humidity.  One time on a short film set, there was a company move from inside to outside.  I think the KMR-8 lasted about 20 seconds before it started sputtering from humidity!  But the Neumanns are well regarded for studio work, and their price point makes them much more attractive.  At $850 each, it’s a much more reasonable proposition to get eleven of these.  My main concern for studio work is a presence boost around 4K, where the other mics are reasonably flat.  There’s only one way to find out if that boost is going to be an issue!  We used the KM 184 (cardioid) for this test.   Yes, the other two mics in the test are super cardioid, but we live in an imperfect world.

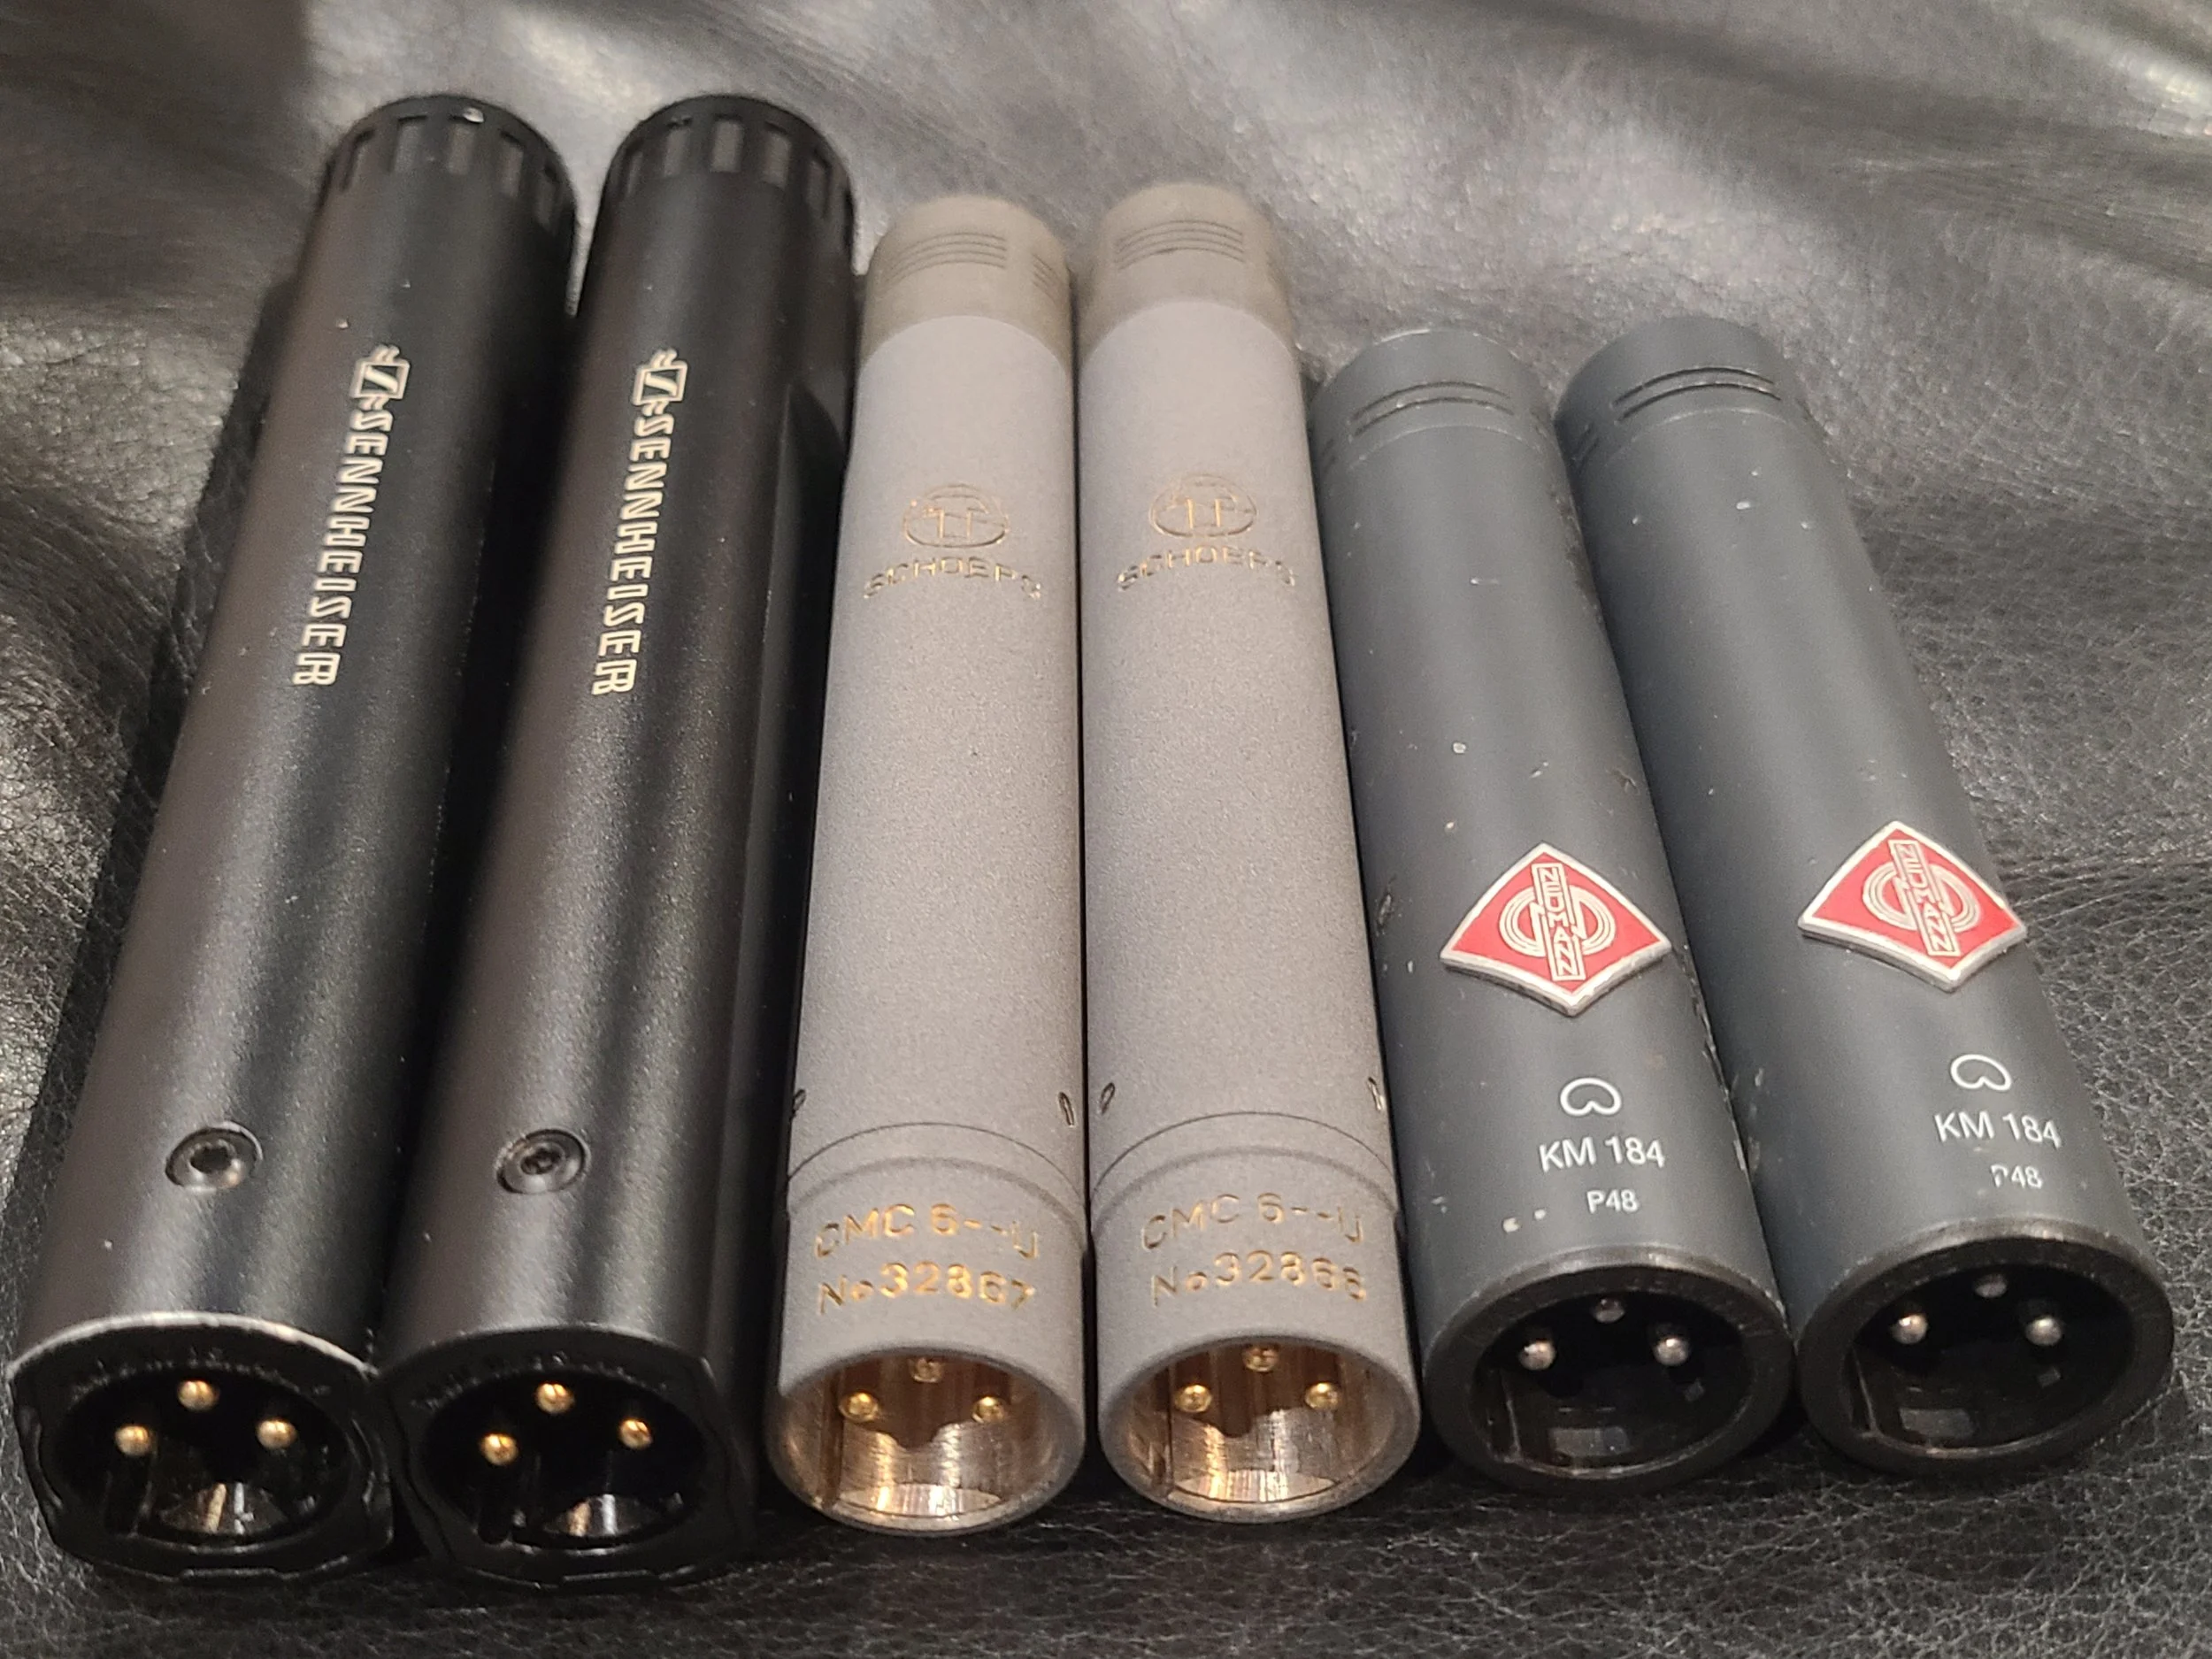
Sennehiser MKH 50, Schoeps CMC6 MK 41, Neumann KM 184

That’s a bunch of German mics.


Methodology


Placement

I decided to use ORTF placement for the three stereo pairs.  This is my personal favorite stereo technique.  My experience with the MK 41s is exclusively using them in ORTF configuration and this is how I’ve achieved borderline spooky imaging with them.  ORTF requires the mic capsules to be 17cm apart and at a 110-degree angle.  I tried to get them as close together as the mounting hardware would permit.  I was able to place the three ORTF pairs in a vertical stack approximately two inches apart.  I hope that’s close enough to not introduce any major variables.  The timing discrepancy between the earliest pair and the latest pair was less than 1ms, so they were very close.  To my mind, the more important variable was being able to record the exact same material on each pair simultaneously for the cleanest possible comparison.

Three ORTF stereo microphone pairs

Detail of the setup


Amplification

This is the variable I was most concerned with.  For this test to work, the gain has to be identical for all six mics.  Ideally, the preamps would be digitally controlled.  My RME UFX+ only has four digitally controlled mic pres.  Our Sound Devices MixPre10 has 8 linkable preamps, but I didn’t want to have to dump files afterward or set it up to work as an interface.  My remaining option was to use a Sonosax SX-ES64, which is a high-end production mixer.  It has a unique 3-way gain selector (instead of a mic/line switch).  I set the switch to the mid setting and kept the gain knobs all the way down.  From there, I took six pre-fader outs and plugged them into a Ferrofish A/D converter.  It’s possible to link the gains on the Ferrofish, so I was able to ensure that all six mics got the exact same amount of gain.

Sonosax SX-ES64 Production Mixer

Sonosax Production Mixer

Ferrofish Pulse Gain Controls

Linked gains on A/D Converter


Test Material

I decided to use four very different sound sources to get the widest possible variety of volumes and timbres.  The four sound sources were: Alto Saxophone, Classical Guitar, Voice, and Percussion.  I then recorded each instrument at two different perspectives that I’m calling ‘near’ and ‘mid’.  Near was about five feet from the mic array and mid was about 15 feet away.  Blackguard’s studio space is not really intended for tracking acoustic instruments.  But it’s a treated room, and it’s relatively quiet so it’s not the worst.  While I wouldn’t want to use these recordings on an album, I think they’re perfectly fine for the sake of comparison.

Sound sources


Analysis

I recorded both performances of each instrument into Pro Tools.  Once I was done recording, I decided to measure the performance in two different ways.  The first way is objective analysis, measuring levels (pseudo) scientifically.  The second is subjective analysis using my ears to pick a favorite.

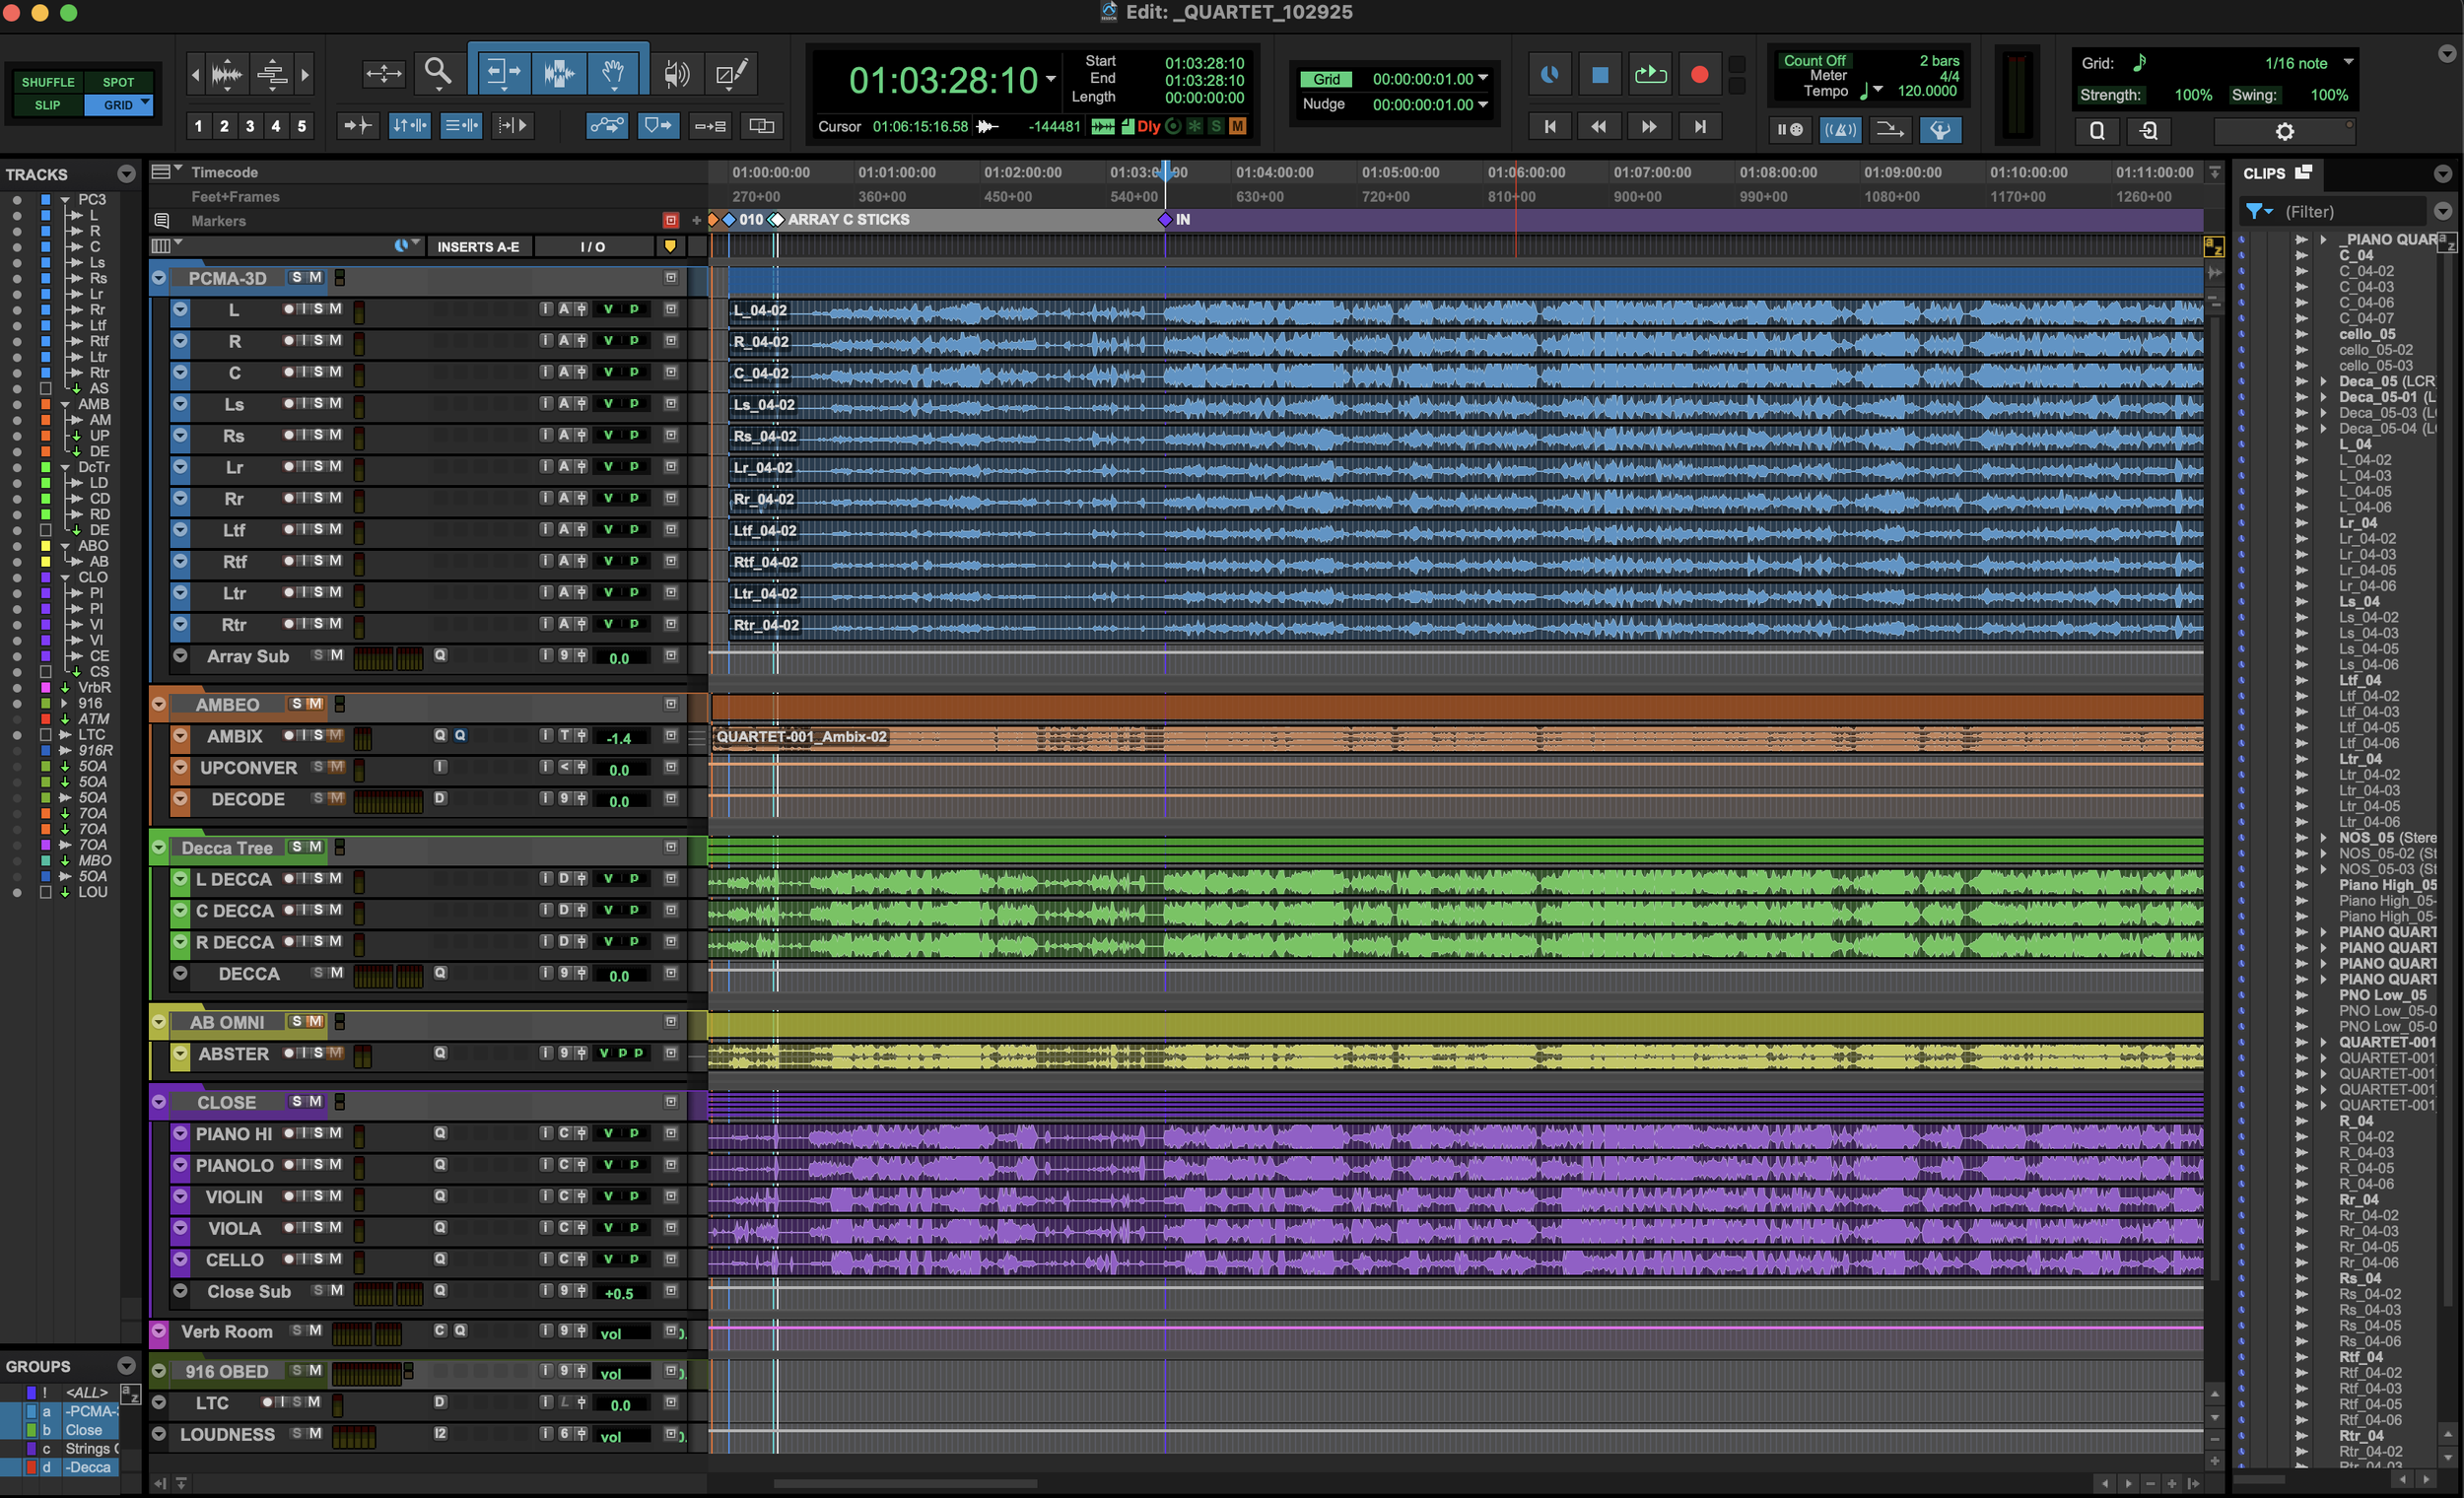
Pro Tools timeline immersive microphone shootout

Pro Tools timeline


Objective Measurement

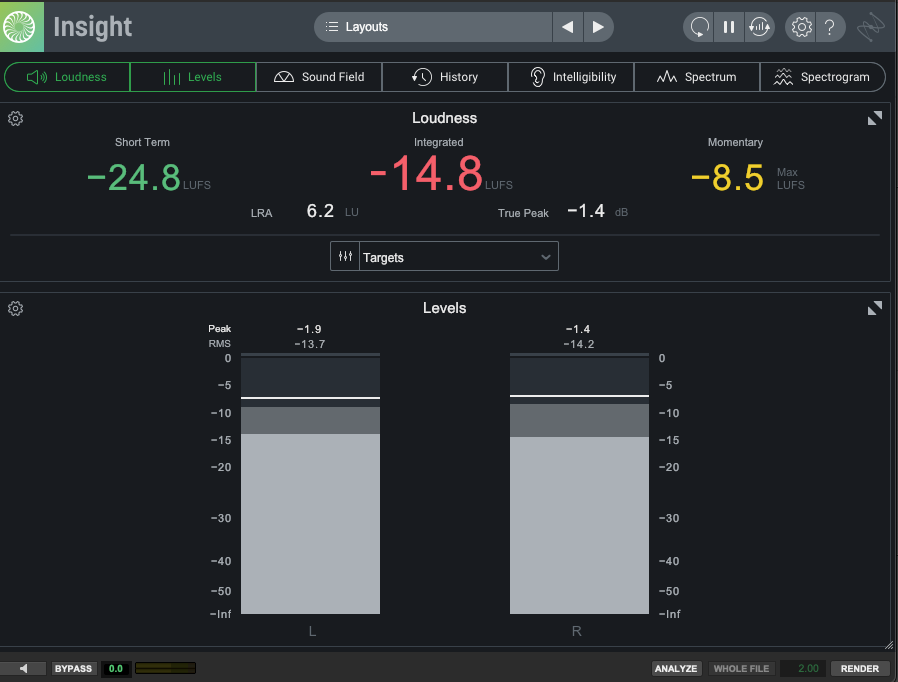
I measured each recording using iZotope Insight 2.  I was looking at three things: Integrated LUFS, True Peak, and Noise Floor.  The integrated LUFS gives me an idea of the mic’s output.  The True Peak (when compared to the integrated LUFS) gives me a rough sense of dynamic range.  Those two measurements are straightforward.  The noise floor measurement is probably flawed, but it is an ‘apples to apples’ real-world comparison.  In each recording, I made sure to remain perfectly quiet for about five seconds.  I then separated this ‘silence’ into a new clip and measured the LUFS again.  However, the LUFS meter doesn’t do great with very quiet recordings, so I raised the clip gain of these ‘silent’ clips by 12dB to get a reliable measurement.  The studio isn’t exactly an anechoic chamber but given the same source material and same gain the only variable SHOULD be the mic’s inherent self-noise. 

Screenshot of iZotope Inisght 2

Insight 2 measurement

Screen shot of Pro Tools audio clip

Detail of noise floor measurement


Objective Results

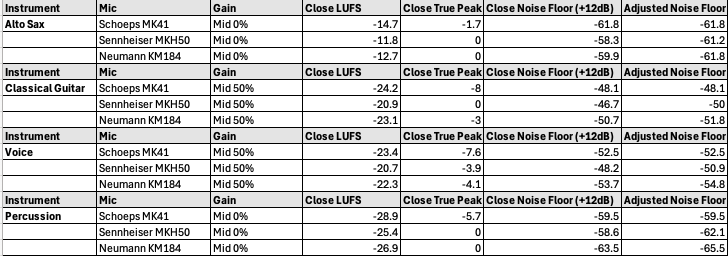
I bet a real acoustician would eviscerate this analysis, but for my needs I feel I got some good information.  For example, the MKH 50 was WAY hotter than the other two.  The MK 41 consistently had the lowest output.  The KM 184 had the lowest noise floor and the most dynamic range.  These things were true across nearly all instruments and perspectives.   Surely, there’s value in this intel.

Spreadsheet showing results of microphone shootout

Some objective measurements


Subjective Measurement

I decided to evaluate each mic pair on two subjective aspects: tone and space.  Tone being the frequency response of the mic and the resulting attractiveness on each source instrument.  Space being how convinced I was by the spatial imaging.  This was the biggest benefit of recording in our studio.  I know the space well and it was very easy to hear the difference in each pair’s spatial performance.  I assigned a rating to each mic for every instrument and perspective:  one for my favorite, three for my least favorite.  The mic with the lowest score wins the subjective analysis.

Spreadsheet showing subjective results of microphone shootout

Subjective grading


Subjective Results

The MKH 50 was the easy winner in the tone category.  The highs are clear and articulated without being harsh.  As an added bonus, the MKH50 (and the 8050) extend well into ultrasonic frequencies – not relevant to this test but as a sound designer I’m a fan.  The MKH 50 also had the best low-end response of any of the mics.  This was especially apparent on the percussion recording and I feel the other two mics really lost something in this regard.  The MK 41 and the KM 184 were much closer to each other, tonally.  I preferred the MK 41, but only slightly (there was only a two-point difference between them). Given the price difference between these two mics, I was pleasantly surprised by this.


The MK 41 was the clear winner in the space category.  It has a nearly magical way of making the space feel authentic.  I suspected the MK 41 was special in this regard and the results of this test confirmed my suspicion.  The KM 184 was the next best, but I still preferred the MK 41 by a nearly 2:1 margin. The MKH 50 lagged far behind the other two.  When compared directly to the Schoeps mics, the Sennheisers practically collapsed to a phantom center that feels like a single point as opposed to really feeling the width and depth of the room.

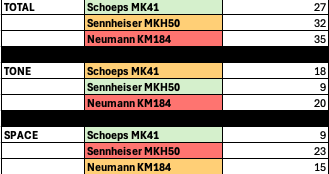
So, there’s a bit of a problem here.  The MKH 50 was my favorite from a tone perspective, but my least favorite from a space perspective!  What were the final combined scores?  Maybe that will help…The KM 184 finished last with 35 points.  The MKH 50 finished second with 32 points.  The MK 41 finished first with 27 points.  OK – so we have a winner but it’s not a blowout.

Spreadsheet showing subjective results of microphone shootout

Final results - overall, tone, and space - low score wins


Synthesis and Key Takeaways

The MKH 50 was the outlier – it consistently felt like a totally different beast on every source.  If this decision was based purely on tonal quality the MKH 50 would have run away with the victory.  However, the whole point of this exercise is to evaluate these mics for use in an immersive array and the MKH 50 lagged far behind the others in this regard.  Despite all the other things the Sennheiser mics have going for them, I think they need to be excluded from consideration. Perhaps this is unfair, and we need to acquire a pair of the newer 8050s for truly fair testing…

The Schoeps MK 41 and the Neumann KM 184 felt much closer to each other.  The KM 184 was just a little harsher (that presence boost rearing its head) and a little narrower.  But I need to stress ‘a little’.  I had to really dig in and A/B a lot to come to this conclusion.  For me, this was a surprise for a couple of reasons.  First, the difference in polar patterns.  I was concerned about using the cardioid KM 184 for this experiment since the other two mics are super cardioid.  But it turned out to be less of a factor than I anticipated.  I’d really like to get ahold of a pair of Neumann KM 185s, which is the super cardioid version, and compare it against the MK 41.  I wonder if that mic would close the gap in the space category…

The technical specs were consistently quite good for the KM 184.  Lowest noise floor. Highest dynamic range.  Middle of the road output.  Least expensive by a lot.  Truly impressive.

This leaves us with a tough decision.  The MK 41 is my clear favorite.  But is it $1,100 better on a per-microphone basis?  Definitely not.  Let’s do some quick math.  A $1,100 price difference per microphone times eleven total microphones in the array comes to a $12,000 difference!  That’s going to be hard to stomach.  There’s an argument to be made that quality and results are all that matter.   I tend to agree with this sentiment, and I’ve never been one to shy away from spending up for professional tools.  However, the difference between these two mics is not that wide.  In the short term, I think we need to rent a pair of the Neuman KM 185s and do another shootout 1v1 with the MK 41s.  If the gap is closed even further this decision will get a lot easier.  For now, my intuition says the KM 184/ KM 185 combo is the right choice but stay tuned to see what we ultimately decide.

Owning a Small Media and Entertainment Business

Birch Grove Myvatn Iceland

Navigating the forest of red tape

Disclaimer

We are not claiming to be small business experts.  As such, no information presented here should be considered professional advice.  Do not pursue any action solely on our advice before consulting an actual expert (lawyer, accountant, customs official, etc.).  We just want to share our experience of blindly fumbling through the various red tape that comes with owning a small media business.  Maybe this info will give you the tools to know where to look if you decide to start your own sound effects, photography, drone piloting, or other small media business. 

Neither Blackguard Sound, nor either partner (Jason or Drew), will accept any responsibility for information presented here that results in damages to the reader.  That said, we have been an honest-to-goodness business since 2018.  This business has brought us around the world and has resulted in halfway decent gross sales, so we’ve picked up a few things along the way.


Business Structure

This is the area we’re least qualified to speak on, but I do want to mention a few basic things.  Blackguard SMG is a Partnership.  Most small media businesses will do better as an LLC, but we have a weird situation where there are only two partners in the company, and we have known each other for 25+ years.  That familiarity allows us to honestly assess whether we are on the same page, financially speaking.  For us, this project has never been about making money - it’s been about the journey, the travel, the experiences, and the gear.  In most other situations, making money will be THE goal and an LLC will do a better job of protecting all involved.  But, when we decided to start this thing, it was easier to create a Partnership (less paperwork and no legal fees).  We went into it with open eyes, so it’s never been an issue for us. 


We are a registered Partnership with the State of Florida Division of Corporations.  We registered our Fictitious Name through the Sunbiz.org website.  Florida arguably has a ton of governance issues, but starting a small business is not one of them.  They make it easy and affordable.  Once we were registered with Florida, we applied for an EIN (Employer Identification Number) with the IRS.  The EIN is our federal tax ID.  Think of the EIN as a social security number for your business.  This will be relevant when we get to the taxes section.


Equipment Insurance

Owning a media business usually means owning a ton of expensive, specialty equipment.  For us, that’s microphones, recorders, synthesizers, speakers, interfaces, etc.  But also, the cameras, lenses, drones, and computers that we use to make promotional material.  Once you start buying gear, it quickly becomes apparent that equipment insurance is necessary to protect your business from serious loss. 


How to Start

We get our equipment insurance through Film Emporium.  They are an insurer that specializes in working with film production companies, so they don’t bat an eye at the sorts of equipment lists we submit.  When we started with Film Emporium, we had to submit an itemized equipment list.  That list includes the following information:  make, model, description, replacement value, and serial number (serial numbers are only required for individual items with a replacement value over $10K).  Every year, when it’s time to renew the insurance, we add all the past year’s equipment purchases to the list.  Then, they reassess the annual rate we pay based on the total replacement value.


Coverage

Without revealing specific numbers, the rate we pay for this annual equipment insurance is roughly one percent of the total replacement value.  Other things to consider that may affect your rate include whether you need the coverage to be international and whether you intend to rent equipment (either incoming or outgoing).  Each of those items is a checkbox on the application paperwork and you will pay more for each of these options.  We extend our coverage internationally and we sometimes rent equipment from other companies, so those two boxes are checked.  We never rent our gear out to others, so we don’t need to pay for that coverage.

We’ve had some minor losses over the years, but fortunately we’ve never had to file a claim.  But we’re happy to pay for the peace of mind!

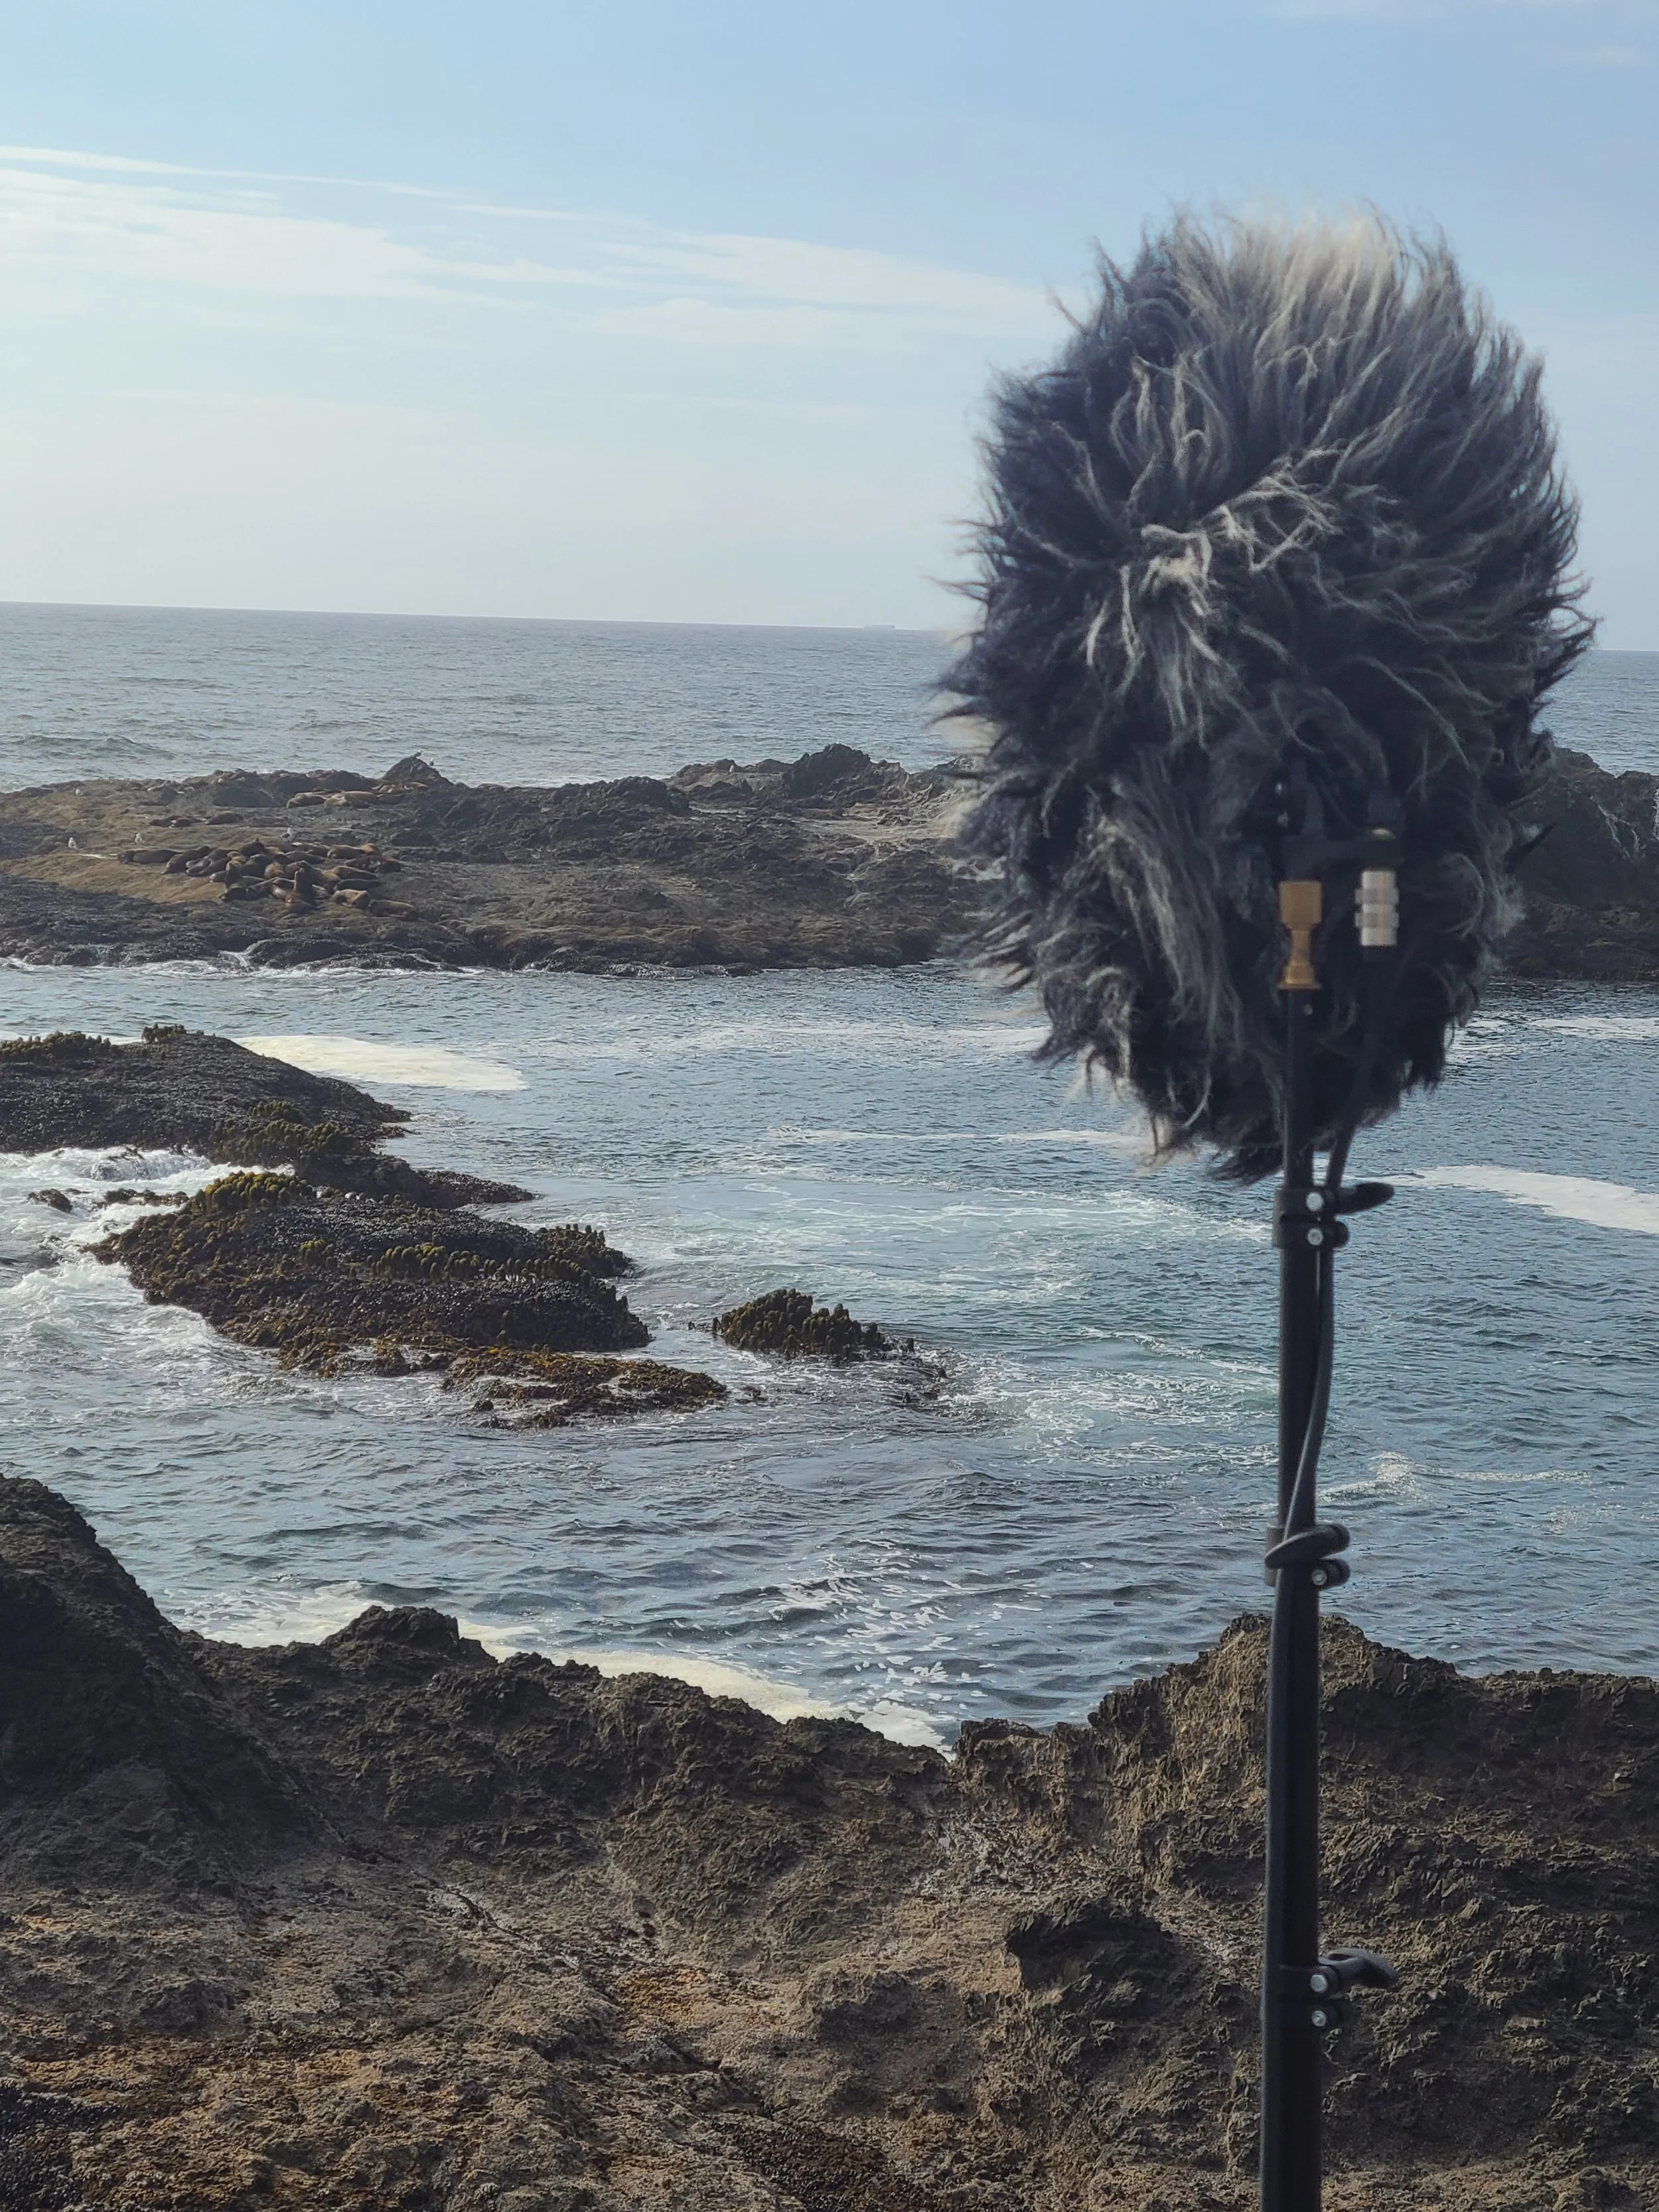
Immersive Recording Pacific Ocean, Northern CA

Equipment in harm’s way. Good thing we’re insured!


Production Insurance

Production Insurance can open doors, quite literally.  For example, a restaurant owner may be rightfully hesitant to allow sound recordists into their kitchen because they’re worried about the liability.  What if we were to get injured by something on their property, like a hot burner?  Or even worse, what if the work we’re doing causes injury to one of their employees or damages their equipment?  But if you can give that same restaurant owner a certificate of insurance (COI) that lists them as an additionally insured entity they will be much more likely to allow you to record.  Also, most permitting bodies (cities and other organizations) require a minimum $1 million liability policy for any sort of permit to be issued.  More on permits below.


Coverage

The amount of coverage you need will depend on the size of your crew.  For us, there are never more than four people involved and we make a very small footprint so we just go with the $1 million policy that will qualify us to get most permits.   For a film production with a full complement of crew more coverage will be required.  Our annual cost for that coverage is about $500.  We don’t always use our liability insurance in a given year, but if you allow a policy to lapse it will be much harder to get a new policy when you need one.  So, we just consider it the cost of doing business and pay it every year no matter what.


We get our production insurance through Liberty Mutual.  It’s a big company so they have a very easy online, automated process for issuing COIs and you can get one issued instantly.  With a previous company, we had to send an email to request a COI, it had to be processed and approved and then we’d get it a couple of business days later.  Fortunately, they dropped us because they stopped covering the entertainment sector and we were able to get something that works a little easier.


Permits

Even though we’re just sound recordists, and not a full production crew, we will try to get film permits when we can.  Especially if we’re going to be in high-traffic areas making any kind of footprint that may be disruptive or attract police attention.  Generally, the police tend to get suspicious if anyone is setting up stands, running wires, etc.  When police see an official permit, they can become an asset.  We’ve had bored cops stick around as crowd control in downtown areas just because what we’re doing was interesting…and legal.  Other times, when we’re in low traffic areas or not taking up any substantial footprint, we will gamble and record guerilla-style.  It’s a balance we’ve figured out after years of experience that tends to work for us. 


How to Get a Permit

All that said - if you’re on public property, a permit is generally required.  Hopefully, the location has a permitting body.  We typically start by calling the local film commission (if there is one).  This can be highly informative.  For example, one job had us recording all over metro Miami.  We gave the local film commission a list of locations and they helped us figure out all the different permitting authorities.  It was a surprising number of different jurisdictions.  The city of Miami is a separate entity from Miami-Dade County.  Within greater Miami, different towns or neighborhoods, like Miami Beach or Coral Gables have their own permitting entities.  Then, if you’re near railway tracks or bus stops, the permit comes from the department of transportation and not the local municipality.  There’s no way we could have figured out that tangled web of permitting bodies without help from the film commission.  They provided that service for free so it worked out great!  Sometimes reaching out can lead to other pleasant surprises.  Maybe they want to send someone from the office to do an interview.  Or in the case of the Icelandic film commission, we got good intel on the things to avoid that would get us in trouble, while basically giving free reign to do anything else we wanted.


Each permitting body will require a COI naming them as additionally insured.  They will also require a fee for issuing the permit.  The cost of each permit varies widely.  Some are free.  Others range from $50-$100.  Some are outrageous.  In one city, the transit authority wanted to charge us $500/ hour to record on a subway platform.  I explained to them that the one ambience of a subway platform would not generate anywhere near $500 in its entire lifespan, but they were firm.  They were used to dealing with film crews and didn’t have any room to budge for other circumstances.  That exorbitant charge led us to scale down the size of the rig and take our chances with a guerilla recording. 


Felid Recording - Guerilla Style

You made us do this…

Another consideration when applying for permits is impact.  Some productions may be considered high impact.  This could be because they have a large crew, or maybe because they need to shut down a city street, which would require a police presence.  Or, in the case of something like national parks or nature preserves, anything with wheels and heavy light stands may be considered high impact because they could damage the terrain or interfere with wildlife.  Fortunately, even our most involved setups would not be considered high impact, but it’s something to be aware of.  In fact, we are so low impact that most permitting bodies are confused as to why we even contacted them or what our job even is…but it’s always best practice to get a permit if you need to.  I’ve seen an entire wedding party in gowns and tuxes get kicked out of a city park because their ‘pro’ wedding photographer failed to secure a permit.  I don’t imagine they got good reviews after that incident!


Sample Low Impact Film Permit - Miami Beach

None of the above addresses working on private property, which obviously requires permission and potentially payment on a case-by-case basis.  Be prepared with proof of insurance and a good pitch to grease the wheels.


US National Parks Update

As of 2025, the National Park Service has new rules for film, photography, and audio recording that aim to make it easier for content creators to access the parks.


International Travel

Travel is easily our favorite part of having a sound effects recording company!  There are some things to consider before attempting to work in another country.  First, and this should go without saying – do lots of research into the location.  Language, customs, hazards, diseases, wildlife…all that.  Definitely get your passport well in advance.  Sometimes there might be a backlog that adds weeks or months to the wait time.  But you can find info about these topics all over the internet.  We want to talk about the carnet.
 

What is a carnet?

Think of a carnet as a passport for your equipment.  Why does your equipment need a passport?  Well, there’s rightfully a lot of concern in the US and abroad about tariffs.   A common way to attempt bypassing tariffs might be to go to an item’s country of origin, buy it there, and then pretend you brought it from home when re-entering the US.  Try this at your own peril.  The carnet is an internationally recognized way to prove that you left a country with the same equipment you brought in.  It allows you to temporarily import goods without paying duties and taxes, so the benefits cut both ways.  It also provides a small layer of protection against unscrupulous border agents who may accuse you of attempting some scam and solicit a bribe to keep quiet.  It’s best to have well known and widely recognized paperwork when crossing international boundaries.  Remember – cases full of esoteric, but obviously expensive electronic equipment will ALWAYS draw attention at the border.


How To Secure a Carnet

During the carnet application process, you will be required to file a travel itinerary (it is possible to chain together multiple countries), an equipment list, valid passport, proof of equipment insurance, and a small, refundable security bond payment (in case you don’t follow the rules).  The equipment list needs to be quite detailed including make, model, serial number, and value.  We have found that it’s OK to clump together smaller, non-serial items into groups.  Like ‘assorted cables’ or ‘assorted batteries’ and try your best to assign a rough value to the lot.  But anything that has a serial number on it must be listed separately.  And customs people are pretty savvy.  They know the camera body and the lens have different serial numbers, for example.


Using a Carnet

Then, the list must be validated by a customs agent in the US before you leave.  I’d recommend bringing it to the customs office a day in advance because it might take a long time to dig through your cases and find every serial number.  Sometimes the agent is very strict and may demand to see every item.  On other occasions, they’ve simply chosen the top five most expensive things and assumed everything else was OK.  But you have to plan for it to take a while, and you don’t want to be doing that when you’re trying to catch a flight!


Next, when you arrive at your destination there’s usually a separate line for people travelling with carnets that need to be inspected.  Just like in the US, the difficulty depends on the agent and local rules.  In Iceland, the customs agent gave the paperwork a cursory glance and stamped it without looking at any equipment.  In Indonesia we were at the airport for hours as they meticulously tore apart a carnet with hundreds of items on it.  In any case, once you have the paperwork stamped you and your equipment are now in the country legally.  Once your paperwork is validated it is vital that you keep it intact.  Treat the carnet folder just as you would your passport because leaving the country without it is going to be an expensive ordeal!


When it’s time to return home you simply repeat the process in reverse.  Except this time, it’s already been validated by customs agents in two different countries, so you probably don’t need to go to a customs office the day before – just arrive at the airport super early.  One final check when you return to the states and you’re done.  Note that the carnet is good for up to one year.  So, if you are travelling to the same country several times in a year with the same equipment you don’t need to apply for a new carnet every time.  Once that year is up you have to mail the carnet back to the company that produced it.  I like to set a calendar reminder because there’s no way I’m going to remember that tiny detail a year on.  After they have received it, you will get your security bond returned (assuming you didn’t break any laws).  For this reason, many people may elect to return the carnet immediately upon return to the US so they can get the bond refunded.  Especially of they don’t anticipate needing it again in the remainder of the year. 


Where to Get a Carnet

The company we use to secure carnets is Boomerang Carnets.  They have been affordable compared to other options and are very easy to work with. 


Blackguard Sound on a glacier in Iceland

Have mic, will travel.


Taxes

Our Partnership files federal tax forms.  Partnerships are considered ‘pass through entities’.  This means that all profits and losses are passed through to the individual partners (as defined by the partner’s share of the business – in our case 50/50).  Those profits and losses are reported via a couple of forms that we’ll lay out below.  Each partner then files an individual federal income tax return reporting their share of the profits and losses.  Fortunately, Florida does not have a state income tax, but we do pay federal income tax on the business’ profits. 


Business Filing Date

One very important note – business taxes have an earlier filing date than personal taxes!  This caught us off guard in the first year and we got fined several hundred dollars by the IRS and had to do a ton of extra paperwork!  Don’t fall into this trap.  As of this writing in 2025, the filing date for a Partnership is March 17th – almost a full month ahead of the personal filing date.   In hindsight, this makes perfect sense since the individual partners can’t do their taxes until the business has submitted.  Doh!


Forms

The first tax form we fill out is a Form 1065 ‘U.S. Return of Partnership Income’.  That’s where we report the business’ profits and losses for the year.  We have to carefully document all income and expenses and those must match up with an ongoing account ledger.  That is, on January 1st our account has X amount in it.  Then once all income and expenses have been entered our account should have Y amount in it on December 31st.  That number becomes the starting number for the next year, and so on.  If the business has a bank account and all income and expenses flow through that, the work basically does itself.  If income is flowing to and from other entities (like PayPal, for example) we have to be much more careful when doing the math.  This form is where we enter the EIN mentioned earlier.

The next tax form we do is a Schedule K-1.  The K-1 is used to report each partner’s share of the profits and losses.  The math is really easy here since there are only two of us and the split is 50/50.  We each use this document to report the income of the business on our personal taxes, similar to how a freelancer would report freelance income.  If the business makes a profit, we have to pay the taxes on it.  If the business loses money in a given year, we can report the loss as a write-off.  Now, we’ve done our duty as citizens and probably paid more in taxes than most politicians or billionaires.


Conclusion

Wow, that was a lot of writing and none of it was about audio!  These are the things we were never taught in school.  Even though we both have multiple media degrees, no one ever taught us how to be freelancers or entrepreneurs.  This all had to be figured out on the fly.  Personally, I find the whole thing fascinating.  I don’t feel bad when we have to pay the bills and do the paperwork.  We can be proud of doing things the right way, and it can be a bridge to talk to other small business owners who don’t work in entertainment.   It can also be good for business.  Our biggest, best-paying clients have always required the business infrastructure to be in place in order to engage with them.  So, we highly recommend being a real business!

Zoom F3 Field Recorder Review

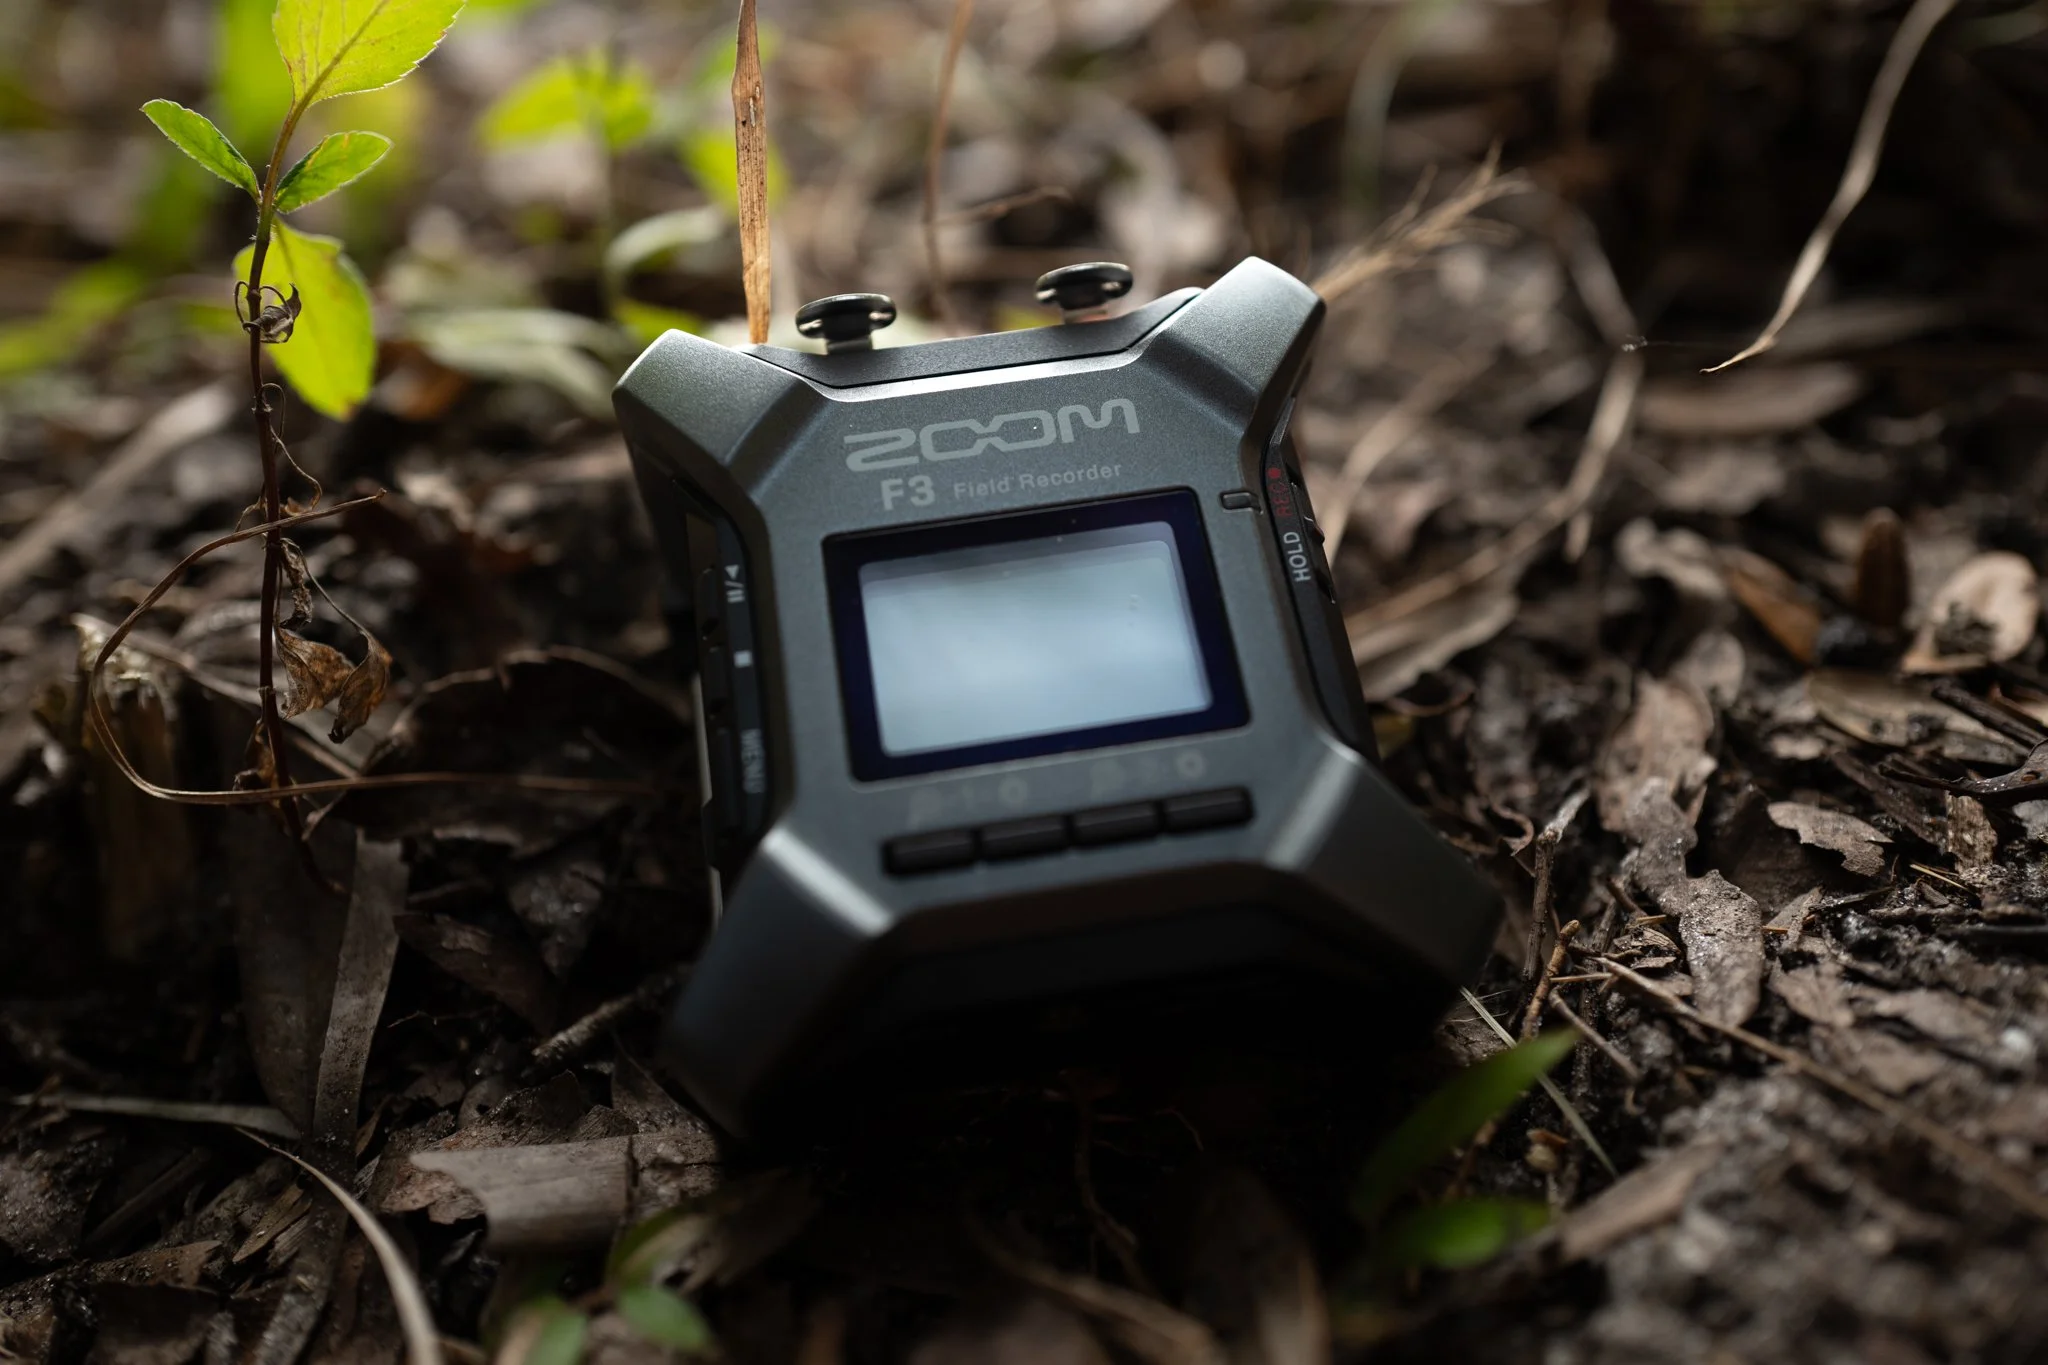
Blackguard Sound Field Recording Zoom F3 in the field.  Drop Rig, Immersice Audio

The Zoom F3 in the field.

Drop Rig Recording

We recently purchased a Zoom F3 field recorder.  Our primary use-case for this recorder is overnight drop rig recordings.  If you’re not sure what a drop rig is, recordists like George Vlad and Thomas Rex Beverly have written amazing guides on the subject.  Recently, our clients have been asking for 32-bit deliverables.  The need / use cases for 32-bit recordings are a whole other blog post, so we’ll get into that later.  Let’s concede, for now, that 32-bit is a requirement and leave it at that.  Anyway, our typical Sony drop rig recorders max out at 24-bit.  And while we love our 32-bit capable Sound Devices MixPres, they are too expensive to leave unattended in the wilderness for days at a time.  This predicament has left us searching for an affordable, reliable, 32-bit field recorder.  The Zoom F3 seems to fit the bill, but how does it perform?  

For overnight drop rig recording, one of the most important recorder specs is battery life.  An ideal scenario would play out like this:  We’d set up a drop rig in the afternoon on a Monday.  Then, we’d let it roll capturing the dawn choruses on both Tuesday and Wednesday mornings.  Finally, we’d retrieve it sometime mid-morning on Wednesday after the dawn chorus has played out.  So, we’d like to be able to roll non-stop from 4PM on a hypothetical Monday until 10AM on a hypothetical Wednesday.  That’s 42 hours of uninterrupted record time in our ideal scenario.

We have two Sony recorders that are up to this task.  The Sony PCM-D10 will do this easily with 4 AA Lithium batteries.  We don’t know what the upper limit is for this recorder because we’ve never hit it, and it’s not worth wasting a set of batteries to find out.  The legendary Sony PCM-D100 will also get there with 4 AA Lithiums.  Sadly, as stated earlier, neither of these workhorses can record 32-bit.  But, if 32-bit isn’t a required deliverable, both are great drop rig recorders (good luck finding a PCM-D100, though).

Blackguard Sound - Drop Rig, FIeld Recording, Immersive Audio

Drop Rig in the field (Zoom F3 not pictured).


Anker Power Bricks

An aside about Anker power bricks.  These are awesome for recording!  Paired with any recorder capable of receiving power over USB, these affordable batteries will give much more expensive smart batteries a run for their money.  That said, there are some confusing aspects of the Anker bricks, and the company doesn’t do the greatest job of making this plain.  There are typically three power modes per battery:

 PD (or Power Delivery)

This is a higher output, fast-charging mode.  This is usually the USB-C output.  If you want to charge your iPhone as fast as possible, this is the way to go.

IQ

This is an adaptive output that will sense the needs of your device and provide power accordingly.  If you want to power a device over a longer period of time, and don’t care about charging it, this is the way to go.  This is usually the USB-A output, so for many recorders you will need a USB-A to USB-C adapter cable. 

Trickle

This mode is for devices with extremely low power consumption, like earbuds.  In some cases, a device may draw so little power that the Anker Brick doesn’t realize there’s anything plugged in and it shuts off.  Trickle mode prevents the brick from shutting off for two hours.  Some recorders with an internal rechargeable battery (like the Sony PCM-A10) may run on trickle mode for a couple hours extra after the internal battery is fully charged.  Trickle mode is engaged by double-clicking the button on the battery so that one of the LEDs turns green.  Single click to exit trickle mode.  Trickle mode is not relevant to the tests that follow.

As we will see, these modes can make a huge difference, so be mindful of them.  IQ mode seems to be the winner for field recorder applications.

Blackguard Sound Field Recording, Zoom F3 Battery Life Test

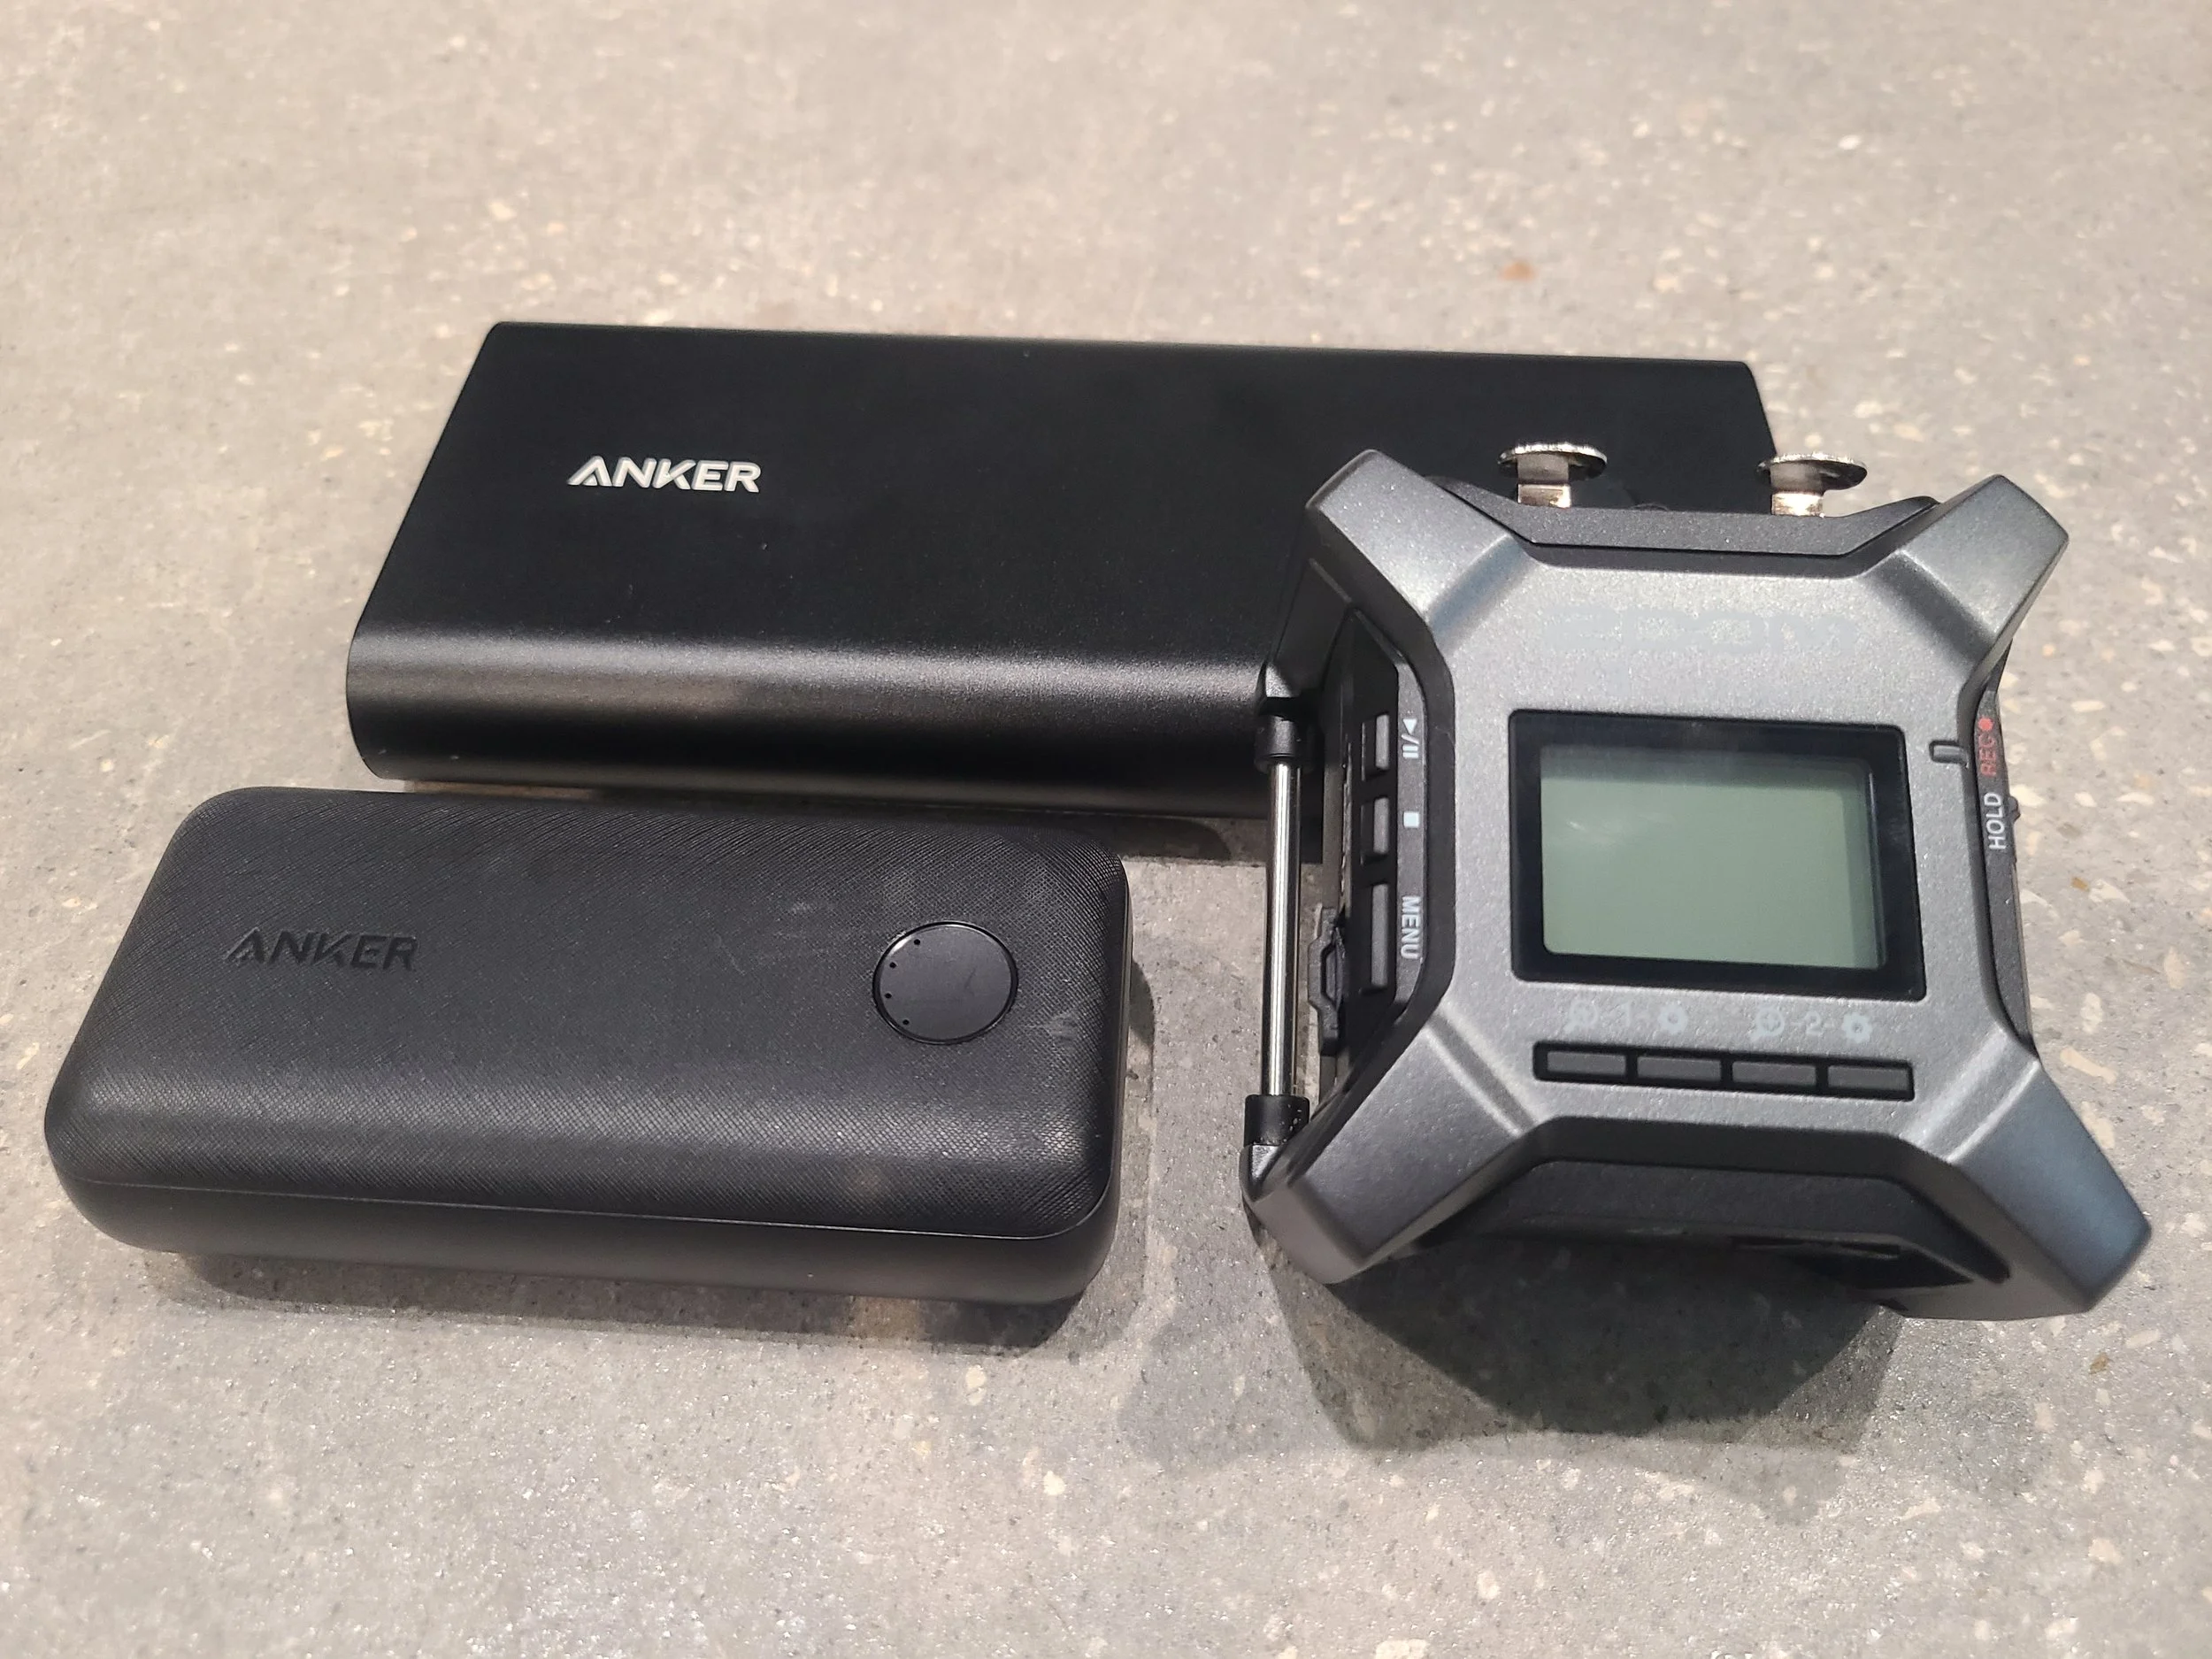
Zoom F3 with the two Anker Power Bricks we tested (smaller 10k and larger 26.8k mA).


Zoom F3 Battery Life Test Results

How does the Zoom F3’s battery life compare?  Let’s find out.  All tests were performed with a stereo pair of Lom Usi Pros, two channels with 48v phantom power.  Recorder settings are 96K / 32-bit.  It is worth noting that battery run time WILL be impacted by the recorder settings as it takes more power to process higher sample rates and bit depths. The screen backlight is set to ‘off’.


Energizer AA Alkaline (x2)

1.6 hours.  Awful.  I wouldn’t use this recorder with alkaline AAs in any scenario.  It’s just creating e-waste.


Energizer AA Lithium (x2)

6.2 hours.  Underwhelming.  The Sony recorders take two more batteries but last at least seven times as long!  Using disposable batteries is not ideal, so the record time has to be amazing to justify the waste.


Anker PowerCore / 10,000 mA / PD (Power Delivery mode via USB-C)

12.0 hours.  Also underwhelming.  This is a compact brick, but I hoped for better.


Anker PowerCore / 10,000 mA / IQ (Adaptive mode via USB-A to USB-C)

12.8 hours.  Slightly better on IQ mode, extended runtime by approximately 7%.


Anker Power Bank / 26,800 mA / PD (Power Delivery mode via USB-C)

23.5 hours.  Still underwhelming given the size of this battery.  It’s larger than the F3!  This battery (in PD mode) has lasted at least 14 hours in a Sound Devices MixPre 6 running four channels w/ phantom, so I hoped for a better result on this test.

Anker Power Bank / 26,800 mA / IQ (Adaptive mode via USB-A to USB-C)

34.5 hours Now we’re getting somewhere.  The big takeaway here is to always use the IQ mode on your Anker power bank!  Just that one change added several hours of additional record time! Switching to IQ mode extended the runtime by about 47% in this case.  I’m not sure why the larger battery performed so much better on IQ mode then the 10K did but there was a marked improvement for both.


Battery Life Conclusions

Even in the best-case scenario, the Zoom F3 doesn’t last as long as we’d like it to, falling short of our 42-hour threshold.  That said, the Zoom F3’s battery life is suitable for MOST recording scenarios.  Imagine getting a full production day on a low budget film set from one 10,000mA low-cost power brick!  We will, however, continue to test other recorders.  Next up is the newer, more expensive Tascam FR-AV2


Zoom F3 Errata

Here are some other odds and ends we feel are worth mentioning to anyone considering a purchase:


Sound Quality

The sound quality is quite high, especially considering the low cost of entry.  The Zoom F series sounds substantially better than the Zoom H series, for example.  I think I prefer it over the various Sony recorders in the same price range.


Menu / UI

I found it to be clunky and counter intuitive.  For some reason, I keep expecting the menu navigation arrows to be in the opposite order.  Adjusting the waveform zoom or ‘gain’ is also tricky - I always mess it up the first time.  That said, these are first-world complaints.  It’s worth putting up with considering the value.


Plug-In Power / PIP

No Plug In Power 1/8 input.  This is a bummer since we love our Clippy PIP mics.  I bet the battery life would be better with those.


The Screen

There’s a nifty screen that shows a realtime waveform of your recording.  By default, the backlight stays on.  You can improve battery life by turning off the backlight, but not the screen itself, which is unnecessary beyond initial setup.  


Build Quality

Really nice.  It’s a chunk of metal.  It makes our Sony recorders feel cheap by comparison.  On par with Sound Devices.  We recently did a test droprig recording with the F3.  The test was supposed to be a relatively short overnight record, 12-14 hours long.  Due to circumstances beyond our control, we were unable to retrieve the recorder until about 44 hours after we placed it.  The humidity was at near 100% the entire time, which was expected.  Contrary to the weather forecast, it rained consistently for about 24 of those hours.  That part was NOT expected.  When we finally retrieved the droprig, the area was completely soaked.  The dry bag had been permeated and everything inside it was damp, at best – bordering on wet.  We placed the entire kit on silica for 8 hours, then turned it on.  Fortunately, everything still works!  So, the Zoom F3 recorded clean audio for over 34 hours in 100% humidity with steady rain for most of that time before the battery died.  It then sat unattended in the rain for an additional 10 hours but lived to record another day!


File Storage

It’s Micro SD, so pretty standard.  I wish it had an alternate storage method for in-the-field redundancy.  The Sony recorders have internal memory that will at least back up some of your data in the event of a catastrophic memory card failure.  The Sound Devices recorders have USB-A ports for large capacity thumb drives that offer amazing redundancy.  Also troubling - if the battery dies the currently recording file corrupts.  Imagine the battery dying in the middle of a crazy awesome dawn chorus and losing up to 46 minutes of solid gold!  BTW, 46 minutes is the approximate duration of each 96k/32-bit file since it caps out at 2GB (unlike many other recorders that cap out at 4GB).

Blackguard Sound - Field Recording, Immersive Audio

Zoom F3 just before getting some rough hours in the field.


Conclusion

Make up your own mind based on your intended usage, but we’re going to keep our Zoom F3.  There’s a chance it may sneakily be the best bang for the buck in field recording (under certain circumstances).  While the battery life could be improved and there are some other minor complaints, it has proven to be reliable in the field which makes it a winner in our book. 

A Guide to Audio Post for Indie Filmmakers - Chapter One : Phases of Audio Post

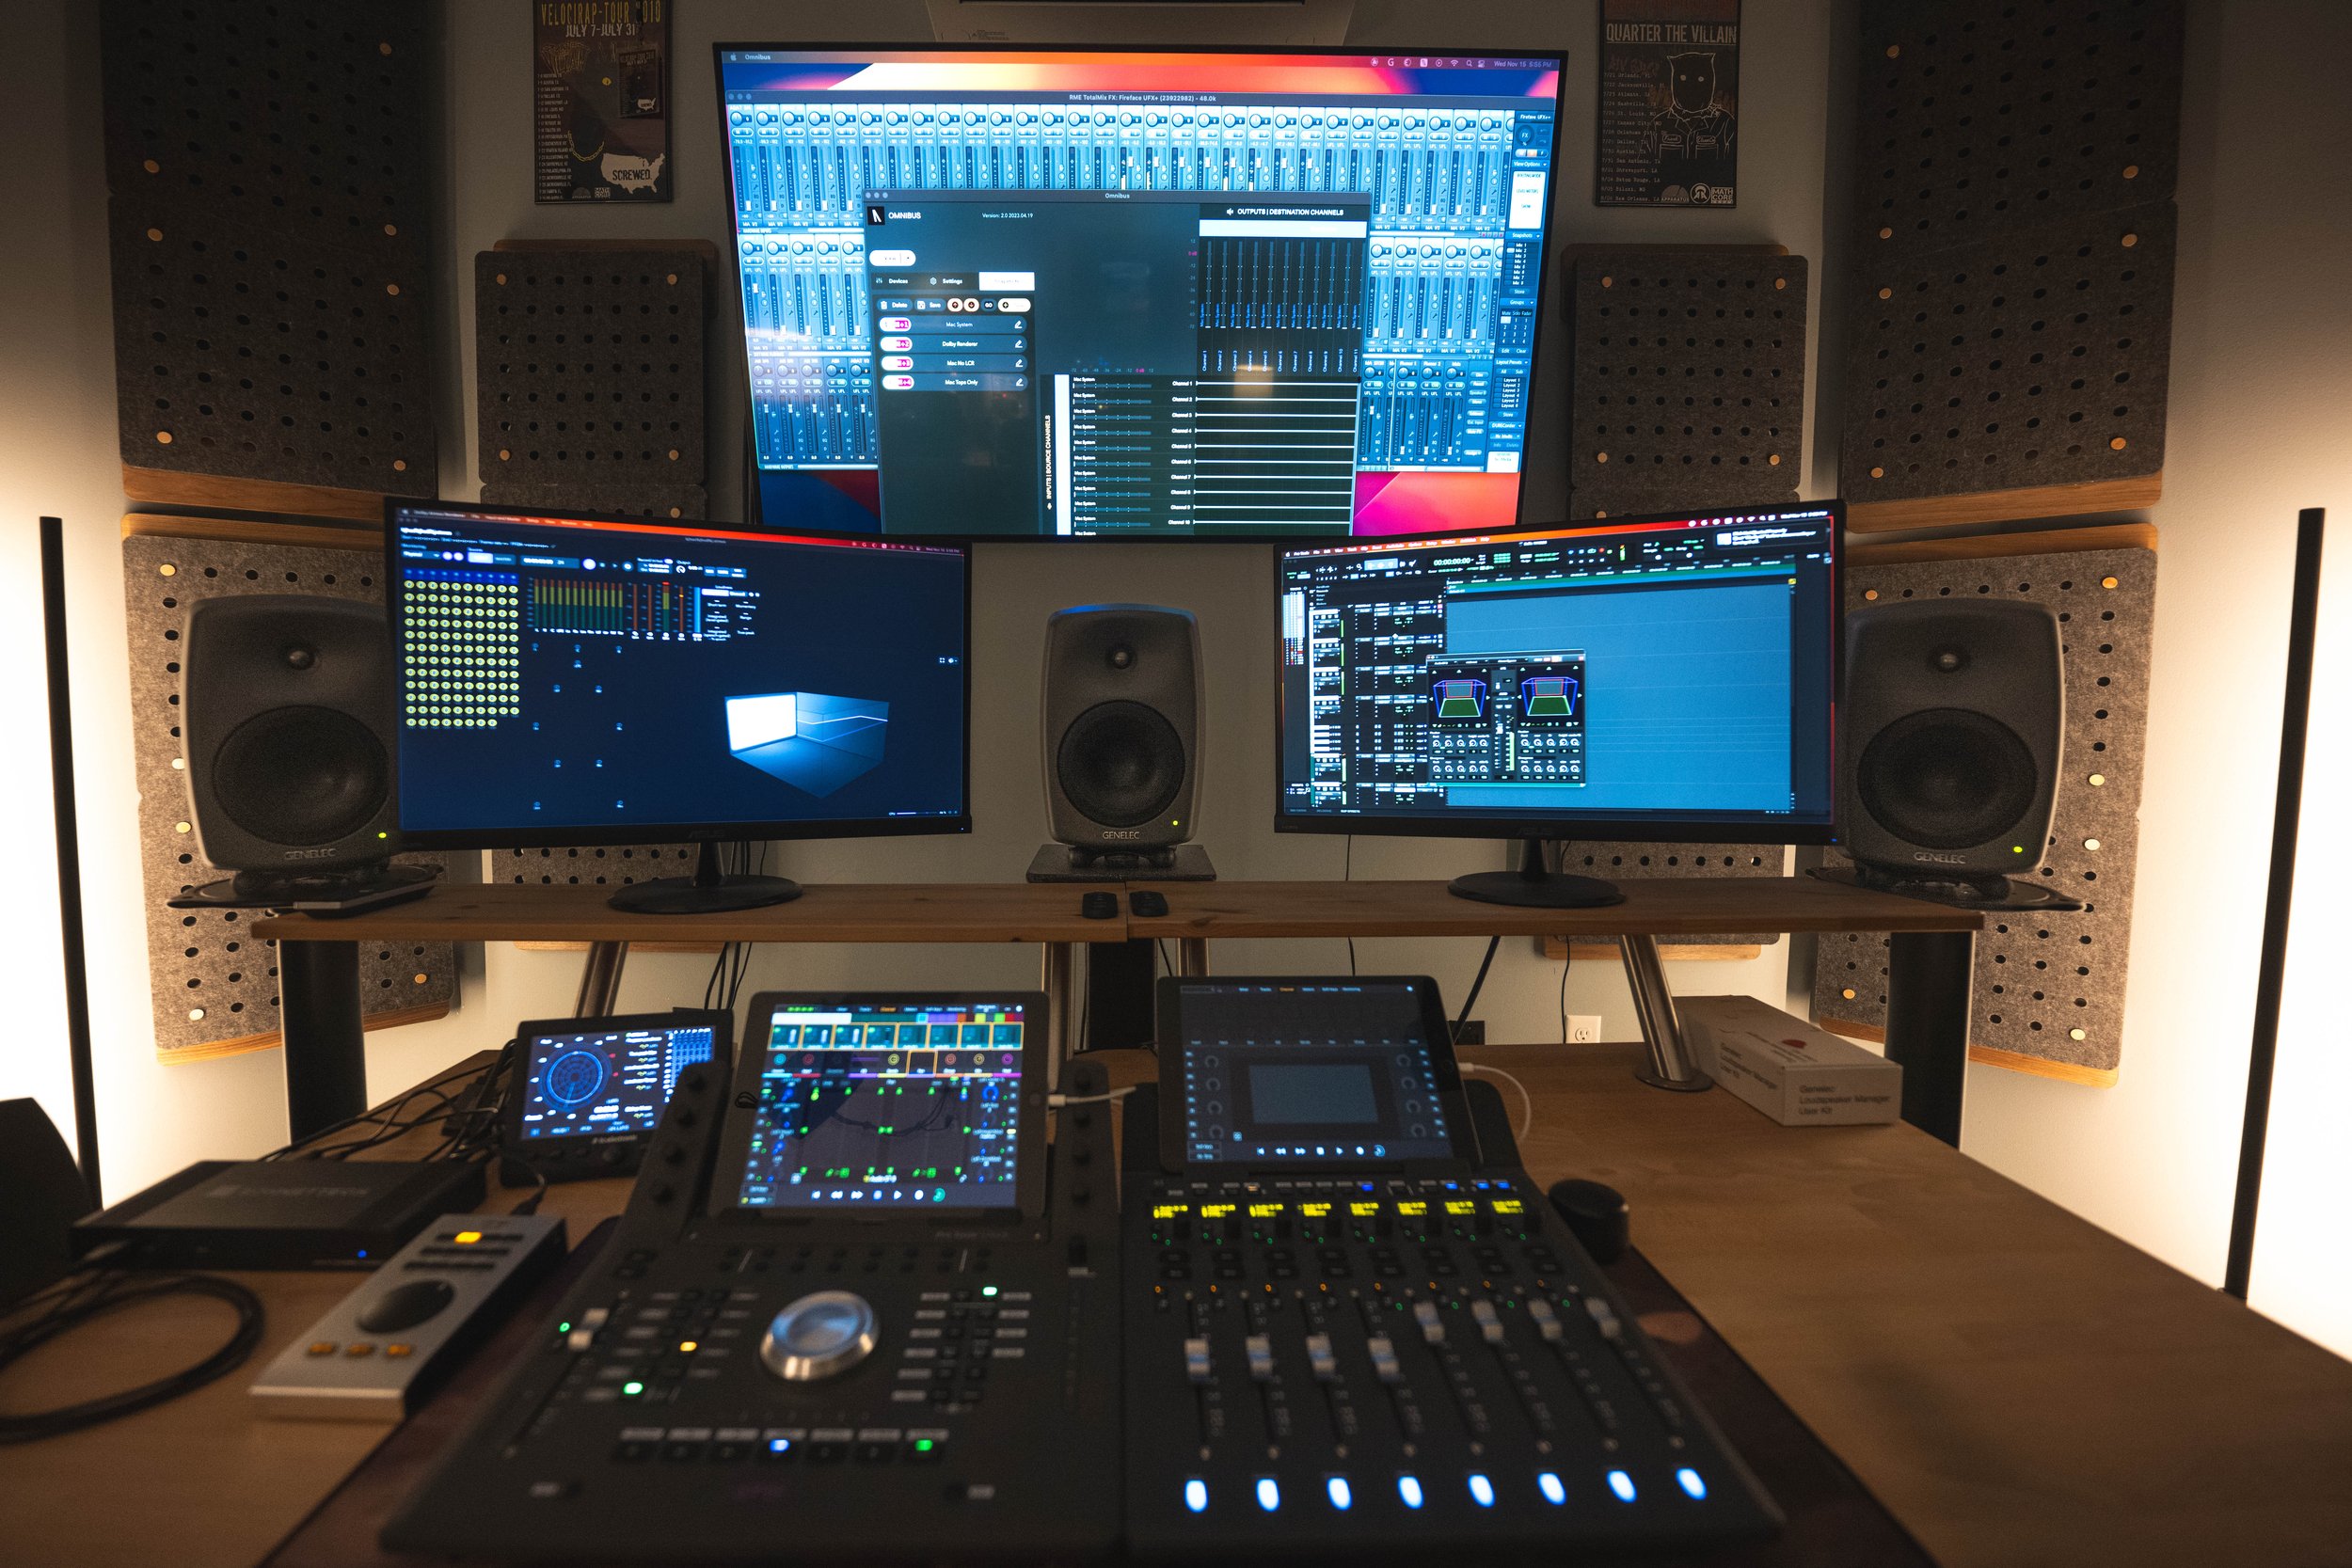
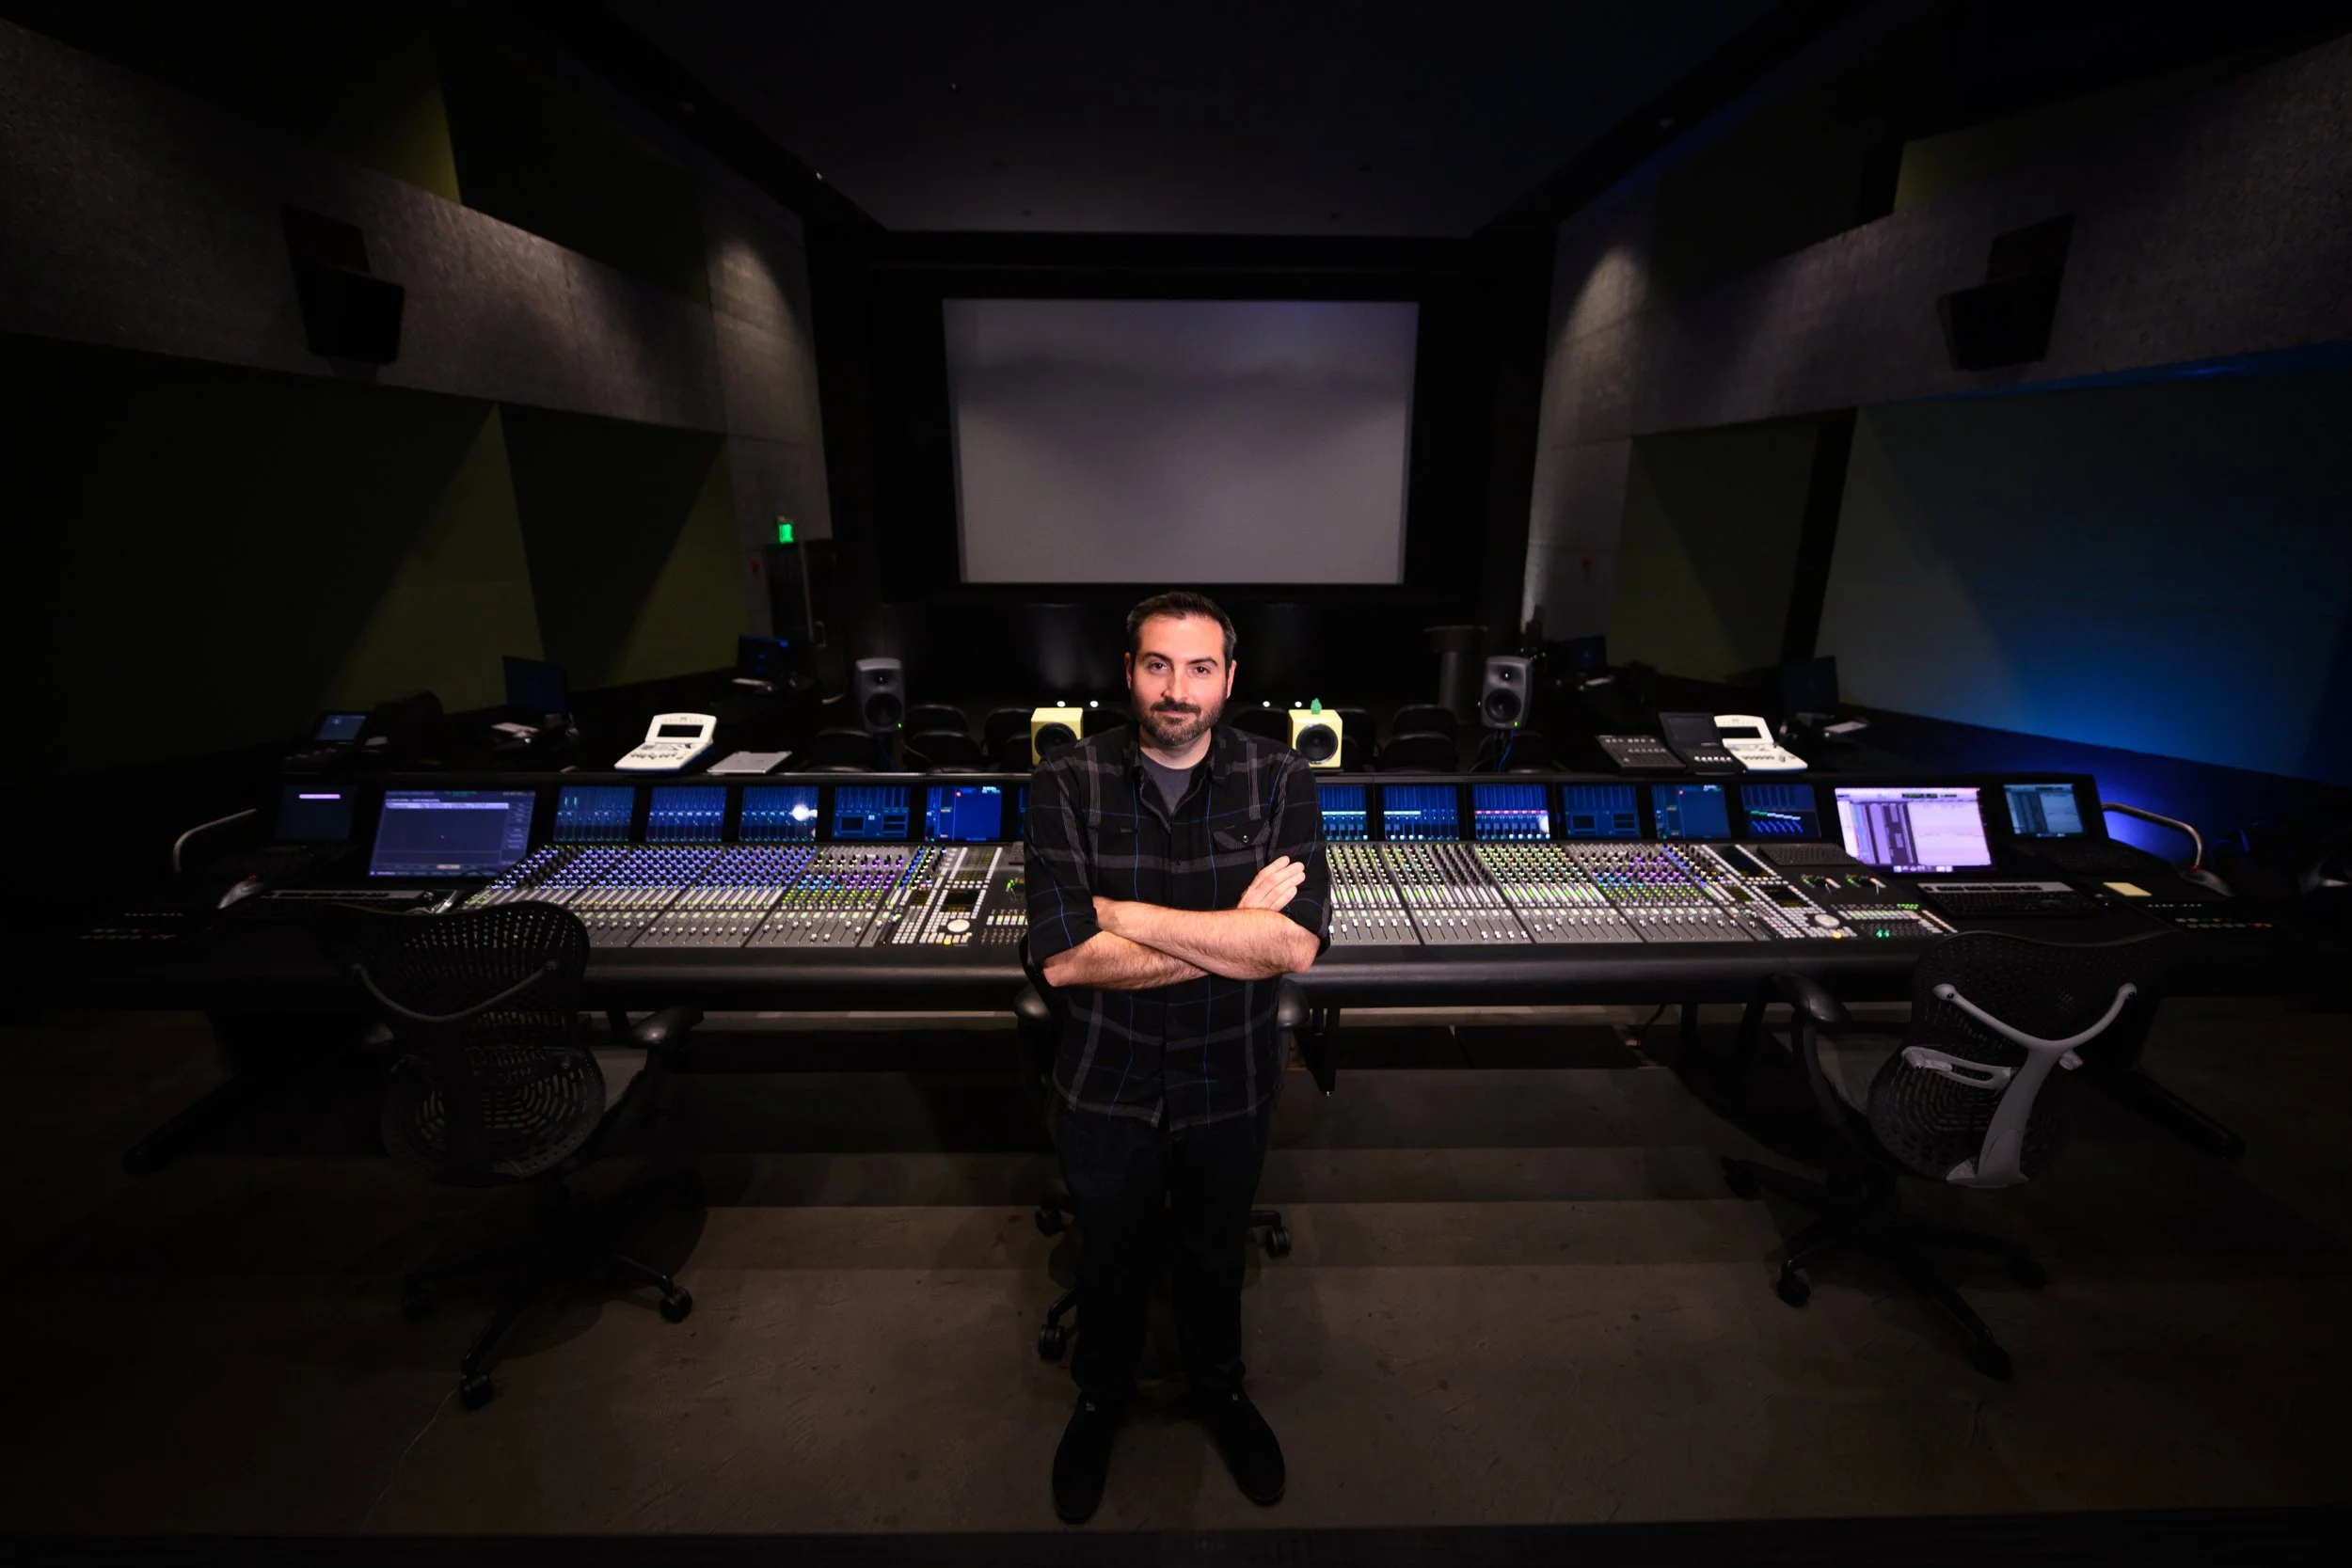
The view from the mix position at Blackguard Sound Studios

Here at Blackguard Sound, we specialize in working with indie filmmakers. In fact, many of the films we have posted are collaborations with first-time filmmakers! We tend to see the same blind spots and pitfalls when it comes to sound and we hope that this blog post can clear up some of the mystery for potential clients and curious passers by. This primer assumes you’re trying to get international distribution for a feature-length film.

Phase one - Quoting / Initial Engagement

In this phase, we will ask to read the script. We will also ask to view a rough cut if there is one. We don’t care if VFX are missing, or if the picture isn’t colored, or if it doesn’t even have a LUT on it. We are used to looking at ugly, incomplete picture! This viewing is just to get a sense of the TRT, the quality of the production audio, and to establish any special needs that may need to be met. After the initial reading / viewing, we will submit an itemized quote that is customized based on your film. We will alert you to any potential future expenses in the rare event that’s applicable. Hopefully, there will be a contract for both parties’ protection that clearly lays out the scope of work, expectations, timelines, contingencies, and avenues for dispute resolution. This should all be pretty standard, but many indie filmmakers neglect these protections.

Note - This phase is how we, Blackguard Sound, do business. Not everyone will operate this way. As independent contractors we’re free to do business how we want and we’re not constrained by investors, managers, exorbitant business expenses, or other concerns that may lead others to operate in a different manner. This does not necessarily de-legitimize anyone else’s way of doing business. Many of the other phases to come are more ‘industry standard’ - this is just our take on the first phase.


Phase Two - Spotting / Picture Delivery Phase

This is the time for you to mention any key audio concerns, especially important scenes, and any audio-related creative ideas you hold dear. You might make references to existing works and we may watch those references for ideas. We will have a sound spotting session where we watch the film together and write down ideas or concerns as they occur. We will likely suggest custom field recordings, especially if the setting or locations are unique from a sonic perspective. We also might ask you for the composer’s contact info. It can be useful to inform the composer of technical requirements and open a creative dialog with them. It isn’t always necessary or possible, but a direct line of communication can lead to a better overall soundtrack.

We will provide technical requirements for the picture editor. The picture delivery for a sound department may be slightly different from what the editor is accustomed to. We will be very particular about frame rate, timecode, video codec, AAF (picture editor timeline) and other odds and ends. Typically, we want the movie broken into reels. In the days of film, there was a limit to how much time would fit on one reel. Even though we know you most likely didn’t shoot on actual film, we still like that workflow. It breaks the film into manageable chunks and if the timeline were to change it limits the damage to one reel (kind of like sealing off decks on the Titanic as it sinks). Typically, these reels will be 20-30 minutes long each, and can be broken up on a scene boundary or wherever makes sense from a story perspective.

Screenshot - Five reels of a film on Pro Tools timeline.

Five Reels on a Pro Tools timeline.


Phase Three - Editorial Phase

Sound editorial for a narrative, feature-length film is a complicated process! Here’s a breakdown of each category:

Dialog Edit

The Dialog Editor will start by ingesting the picture editor’s timeline. They will sort through all the available microphones from the set and discard any that aren’t useful. They will separate the spoken dialog from any production sound effects. Next, they will sort the mics onto dialog tracks to smooth out the transitions between shots, so that the master shot smoothly transitions to the closeups with no noticeable jumps in sound quality. Then, they will bring the dialog volume levels up to industry standards and perform any necessary noise reduction - it’s usually a lot. Finally, they will sort through alternate takes if any lines were deemed to be unusable. At the end of this process they should have the dialog sounding pretty good and will provide a list of lines they’d like to propose for ADR.

About two minutes worth of a dialog edit in Pro Tools

Sound Effects Edit

The Sound Effects Editor will use an extensive library of sounds to populate the timeline with thousands of individual sounds ranging from backgrounds (aka ambiences) to doors, cars, gunshots, etc. They are trying to accurately recreate reality while adding some Hollywood flash. This involves way more intricate detail than most people would imagine.

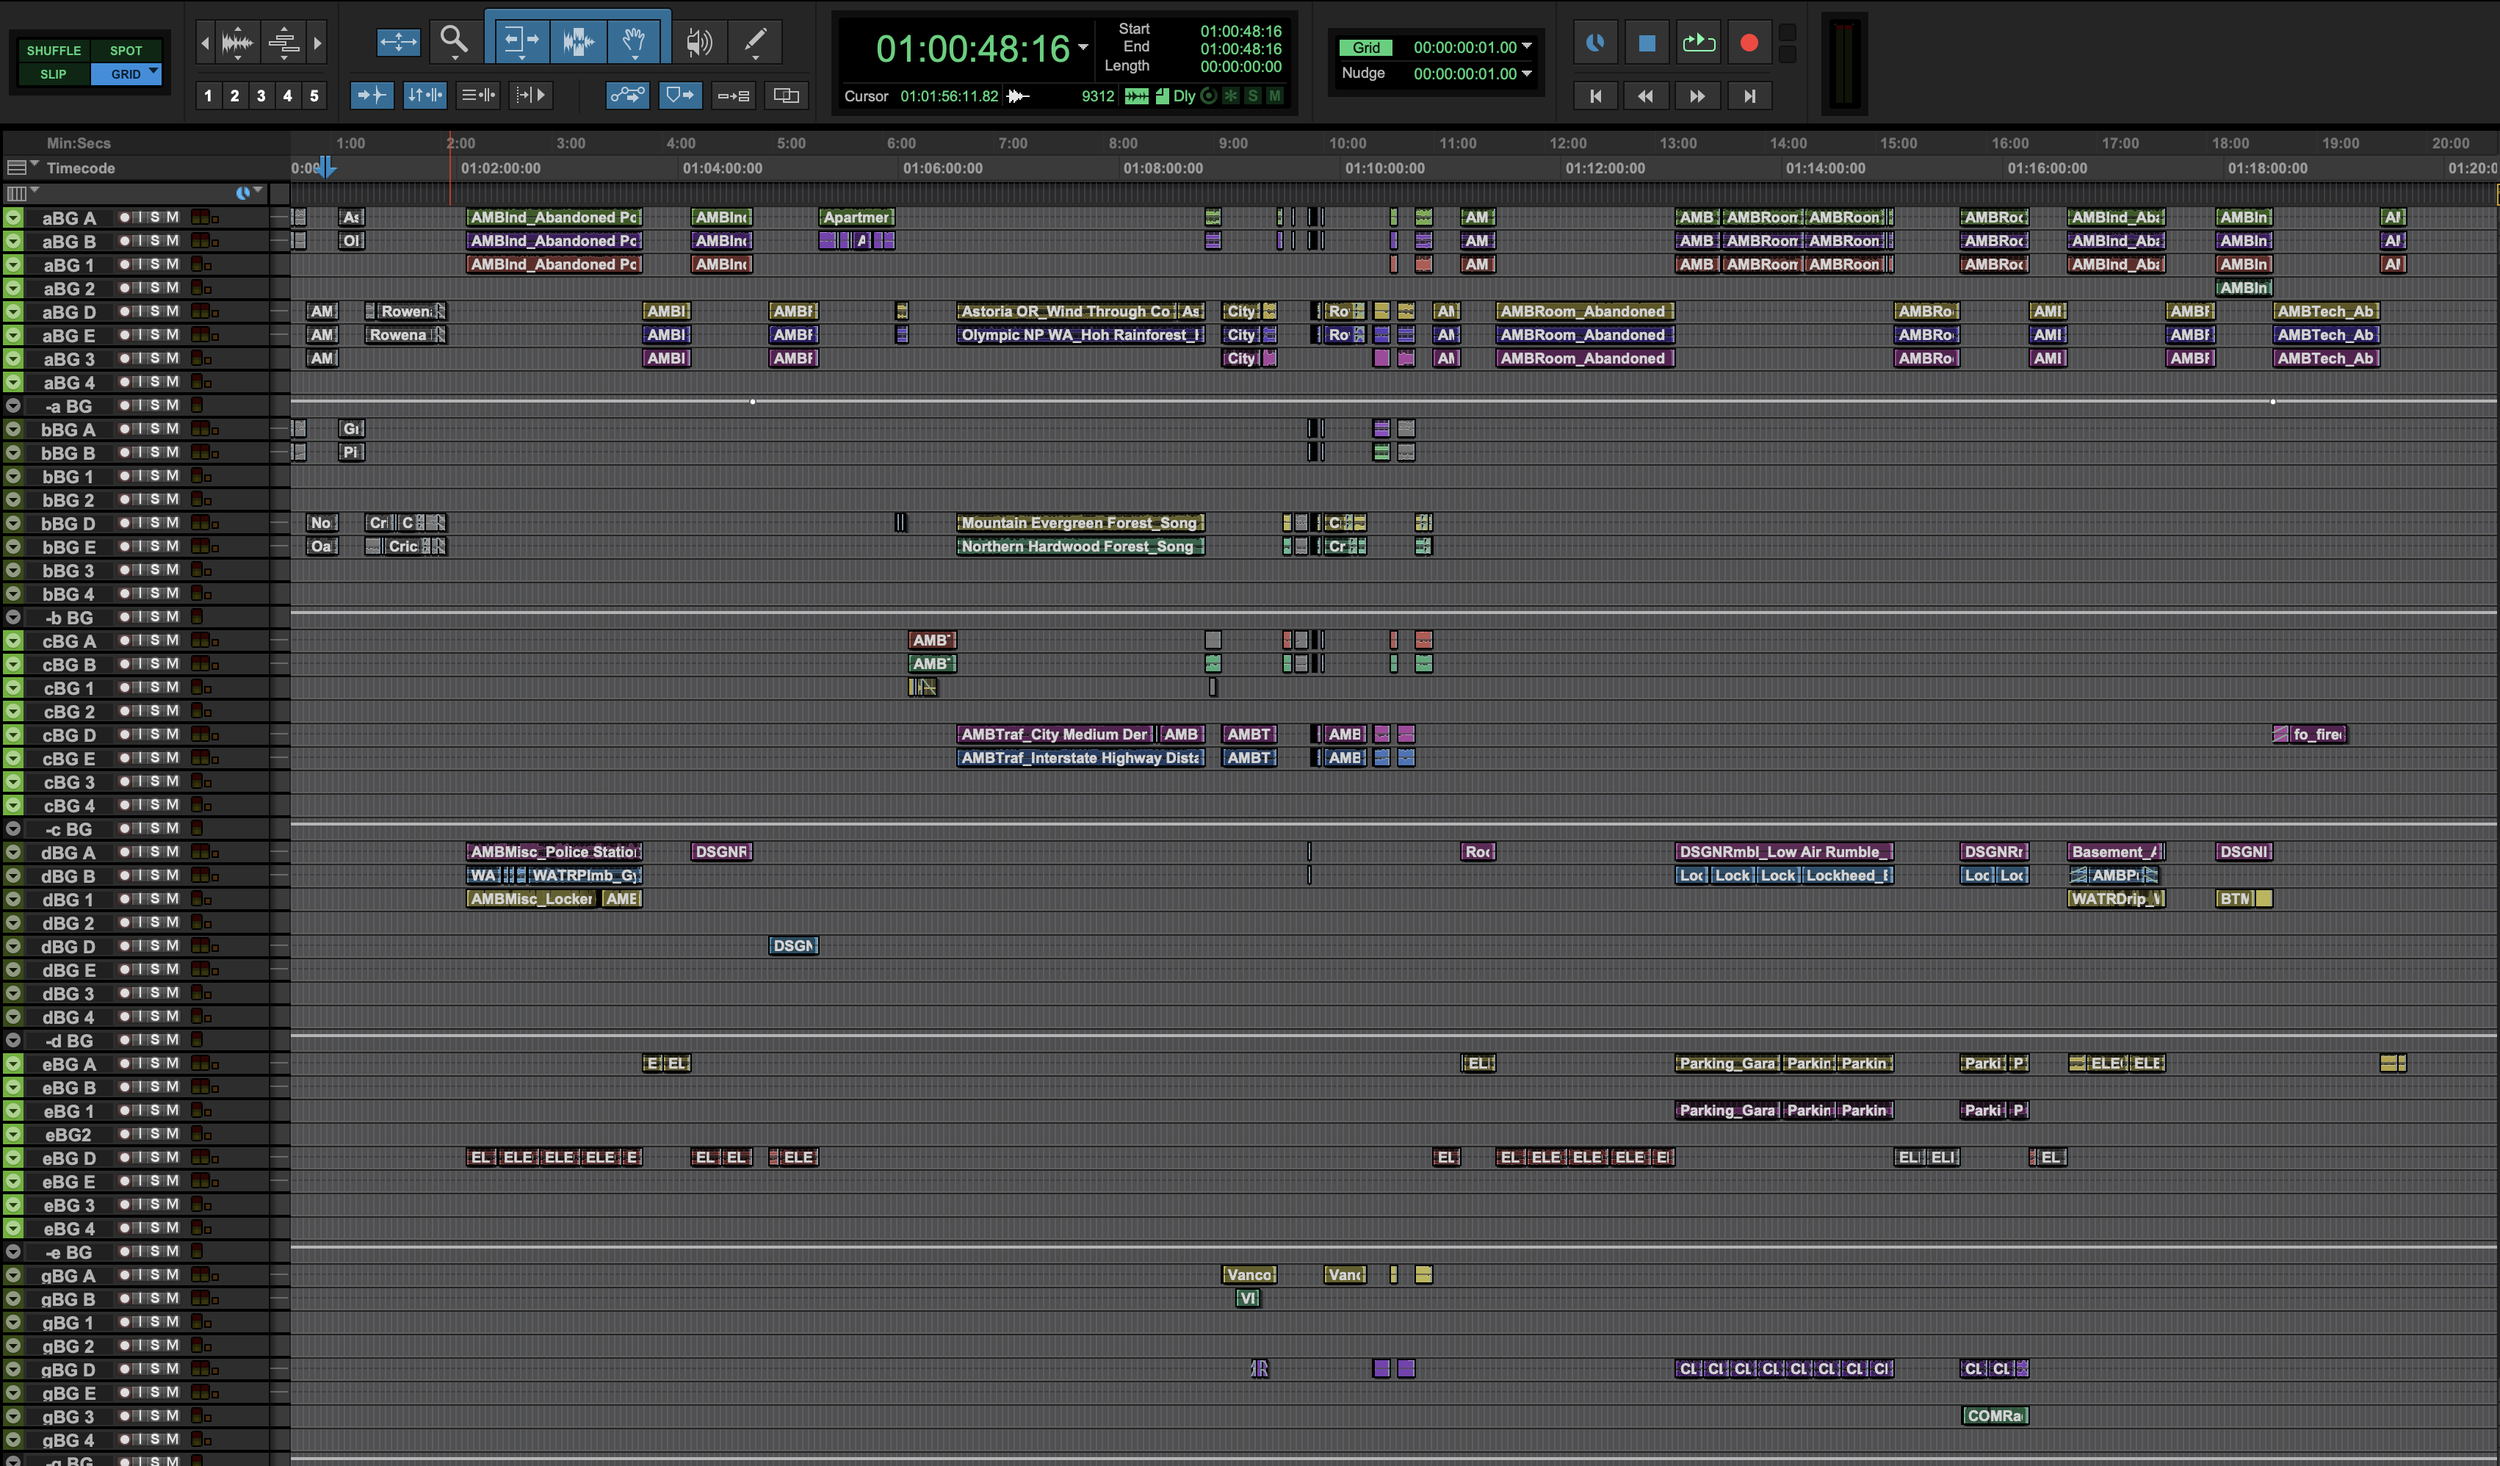
Screenshot - backrounds edited in Pro Tools

One reel of backgrounds edited in Pro Tools

Sound Design

A Sound Designer is more likely to be employed on certain genre films like horror, science fiction, or fantasy. They are tasked with building highly customized sounds for more fantastic elements like creatures, gore, space ships, futuristic weaponry, magic, etc. This will require lots of creative experimentation, trial and error and subjective opinions. This role will most likely not be required on genres like drama or romance (provided the setting is not in some far-off historical period).

Screenshot - sound effects edit in Pro Tools

Sound Design PreDubs in Pro Tools


Phase Four - Recording Phase

Low budget independent films can benefit greatly from loads of custom recordings. It’s a relatively low-cost way to add tons of production value. In many cases, these items aren’t optional. Here are some typical examples.

Foley

Foley is the non-dialog sounds created by the characters in the film. Footsteps, clothing movements, and prop interactions that are often impossible to accurately record on set. For reasons unknown to us, many filmmakers will refer to the sum total of the sound effects as ‘foley’. That would be a misnomer. One key distinction: whereas sound effects are edited onto the timeline, foley is recorded in real time by a foley artist (performer) and foley mixer (recordist). You may be wondering - why not edit those sounds in? Why do they have to be custom recorded? A typical 90-minute film has approximately 3,000 foley spots! Custom recording these elements is MUCH faster than editing them in. Another important aspect to consider with foley is the M&E. We will discuss the M&E later when we explain deliverables but suffice it to say your movie will not get distribution without extensive foley recording!

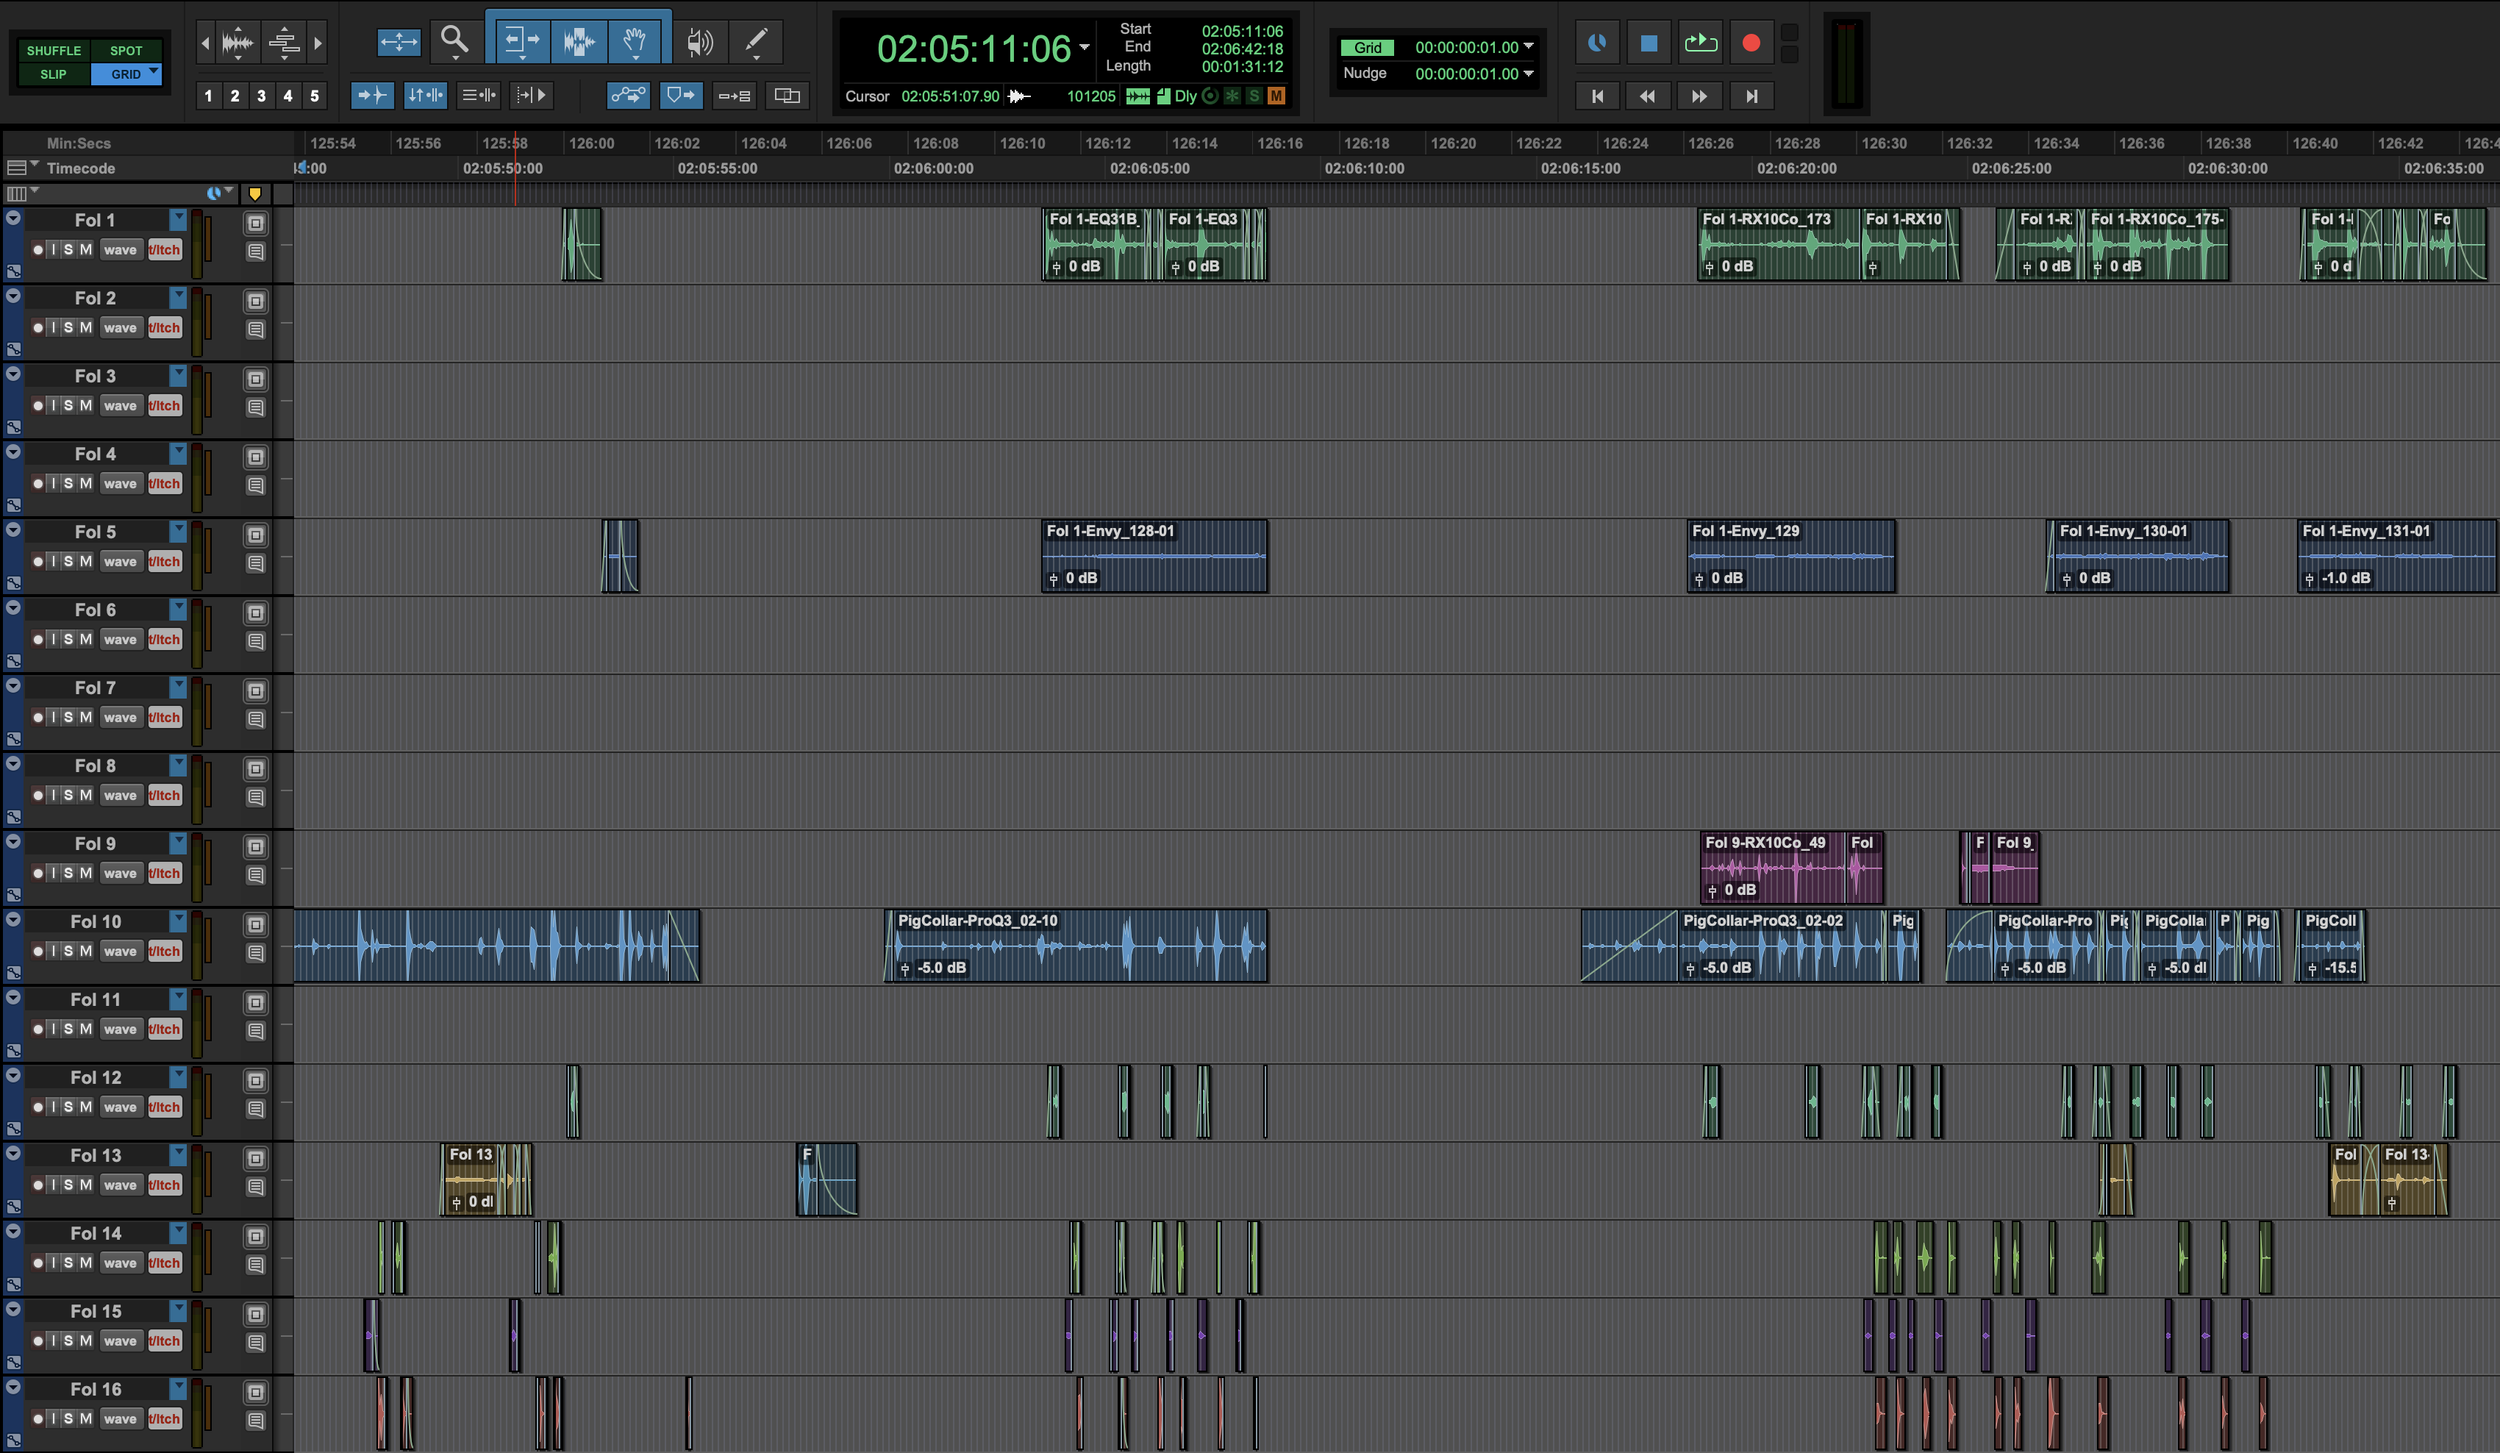
Screenshot - Foley Edit in Pro Tools

Approximately 45 seconds of a Foley timeline in Pro Tools

ADR

Also known as dubbing or looping. This is where the actors come into the studio to re-record lines that have unfixable audio issues. It’s also an opportunity to add new lines to help propel the story forward or fix continuity issues. All we need is a shot where the actor’s lips aren’t visible and you can add just about anything! The actor will read their lines while watching themselves on screen and lip sync will be crucial! It can be tough to get the actors back into ‘on set’ mode so an experienced ADR recordist will also sometimes serve as a performance coach along with the director. Any ADR will need to be sonically matched with the production audio so it’s not obviously dubbed, which can take viewers out of the moment.

Loop Group / Crowd Walla

This may be required for films that have scenes of crowds, especially if there are specific call outs that need to happen. Imagine a scene where protestors are shouting slogans about something specific. Or a sporting event where crowds need to react to specific actions on the field. These types of crowd vocals are too specific for pre-existing sound libraries to be useful so they are often custom recorded.


Phase Five - Mix

The mix is where all of the elements come together. Upon completing the editorial and recording phases, there are potentially tens of thousands of little pieces of audio spread across hundreds of tracks. Certain genres may even exceed 1,000 audio tracks! All of these elements now need to be carefully blended together to create the detailed, realistic, and enormous sounding mix that movie-goers want to hear.

Pre Dubbing

We will meticulously focus on each of the above elements one at a time. The dialog comes first, since it is the only element with strict technical standards that must be adhered to. Once the dialog has been mixed, we can start folding in other layers until everything is accounted for. This can be a tedious process. We may play the same line of dialog 30 times in a row to get the EQ settings just right. Or we might play through the same intricate action scene 20 times, making sure every sound is panned to the exact right place in the theater. Typically, we do not need the filmmakers to be present for pre dubbing. We may send ‘WIP’ versions of the mix for review, but we’re mostly working in solitude at this point.

Final Mix

Typically, we’re about 90% mixed at this point and it’s sounding pretty good. It’s finally far enough along for you, the filmmaker, to come in to start giving your valued creative feedback. This stage is where we will work most closely with you and the rest of your creative team. You will sit on a comfy couch and watch as we play through, giving notes and feedback along the way. We will fix most things in real time and play it back for approval. In most cases, we will allocate one full day per reel so we can really dig in with the details. Then one additional day for last looks and final notes on the whole film. We will likely address hundreds of major and minor notes and that’s normal! At a certain point audio is subjective and we may not hear things exactly the same way. It’s your movie and we’re providing a service so we will usually defer to you on creative matters unless we strongly disagree based on our experience. We may push back a little harder on technical details since we’ll be on the hook for those.

Mix day on the Dub Stage


Phase Six - Assembly / Deliverables

Once the mix is complete, the reels need to be reassembled. We will handle that to make sure the reel transition is smooth and any music that hangs over the reel boundaries are handled properly. You will receive a handful of different files, all the full length of the film, in both surround sound (5.1 or 7.1) and in stereo. If your film was mixed in Dolby Atmos there will be an additional set of deliverables for that, too. Here’s the list:

Dialog Only Stem

Just the dialog. No music or effects. This might end up being useful if anyone needs isolated dialog for the trailer and it will be used to derive the QC report (more on that later).

Screenshot iZotope RX Dialog Only Stem Audio Post

Spectral image from iZotope RX of a Dialog Stem from a somewhat recent film

Effects Only Stem

Just the sound effects. No dialog or music. This is also most likely to be used for the trailer and there are also QC implications.

Sound Effects Stem - bonus points if you can tell what the sound is.

Music Only Stem

Just the music. No dialog or sound effects. This may be helpful for the trailer and for creating a music cue sheet in some cases. No QC implications here.

Screenshot iZotope RX Music Only Stem Audio Post

Music Stem from the same movie.

M&E

Music and Effects only. This is a version of the soundtrack with the dialog muted that is used for foreign language dubbing. They don’t want to have to recreate the whole soundtrack - just the dialog. This is where foley becomes extremely important. If you mute the dialog, you also mute any production sound effects that went with it. Those sounds now have to be present in the foley or the distributor will reject the film! Note - if you engage an audio post team to work on a festival film they may not provide a ‘fully filled’ M&E, since that deliverable is not required for festival submissions. Make sure your contract clearly specifies which deliverables they are responsible for…delivering. If an M&E isn’t specified and you end up needing one later, be prepared to pay an additional fee. We have been contracted to complete just the M&E for festival films that unexpectedly got a distro deal. Of course, we charge for this service and so should your existing sound department if it wasn’t specified from the beginning.

Printmaster

This is the full mix of everything and the main event. This is what US viewers will see in the theater or on their screens at home.


Phase Seven - Completion

Quality Control (QC)

Before the distributor buys your film, they will employ a 3rd party post facility to run QC checks on the film. They will meticulously analyze the film, moment by moment, looking for technical mistakes. They are checking that sync pops are present, sound effects and dialog are in perfect sync with the picture, sounds are playing out of the correct stems, dialog is at a reasonable quality / intelligibility level, and that the M&E is ‘fully filled’ with foley and sound effects to satisfy the needs of the international dub. That is, everything that could conceivably make a sound has to have a sound present in the mix. There are more technical details that go into this, but let us worry about that! It’s been a long time since we delivered a film that had any QC issues, but with so many moving parts it’s possible for something to slip through the cracks. We will be responsible for any audio related QC failures and will submit a corrected version of the film if required. Note that your video post department will have to run this gauntlet for their work as well.

A lightly redacted QC report from many years ago.

That should conclude our work on the film. Any lingering payments will hopefully be made once QC is passed and the distributor is satisfied. The total time elapsed from phase one to phase seven varies for each film, but is usually 3-4 months. Any period longer than that on an indie film is usually due to delays outside of our control (like waiting for score / VFX to be completed or waiting for music rights to clear). This will have represented many hundreds of person-hours of labor which, again, will vary widely based on the needs of the project.


Conclusion

That’s a wrap on chapter one! We will add more chapters in the future. Of course, this isn’t 100% exhaustive but hopefully it’s an eye-opening start. We aim to be the best audio post choice for indie filmmakers in Orlando, FL and beyond. Please email us at blackguardsmg@gmail.com for specific questions about your film.

Immersive Field Recording with the Sennheiser AMBEO

Blackguard Sound specializes in immersive field recording. We’ve tried several techniques including Double Mid Side, 1st Order Ambisonics, and 2nd Order Ambisonics. We’ve even experimented with recording a solo cello with 17 mics configured for immersive playback (but that’s a separate post)! Our current favorite solution is the Sennheiser AMBEO 1st Order Ambisonics mic. Read on to find out why the AMBEO is our go-to mic for projects all over the world.

Sennheiser AMBEO on location in Iceland

Why Sennheiser AMBEO?

Flexibility

We wanted the ability to deliver B-Format for immersive media, 5.1 or 7.1.4 for post, and stereo for YouTubers.  The Sennheiser AMBEO allows us to bring one mic and generate all of these assets without complicated (and heavy) mic bars, multiple stands, careful measurements etc. We’ve recorded in different surround formats over the years and AMBEO is the only thing portable enough for the tough locations we tend to record.

Sound quality

We’re very happy with AMBEO’s sound quality.  Low end power and high end details are equally well preserved.  Upon properly decoding to 7.1.4, the surround image is immersive and accurate.  Peers that have tried other Ambisonic mics are consistently impressed with what we get from the AMBEO.

Build quality

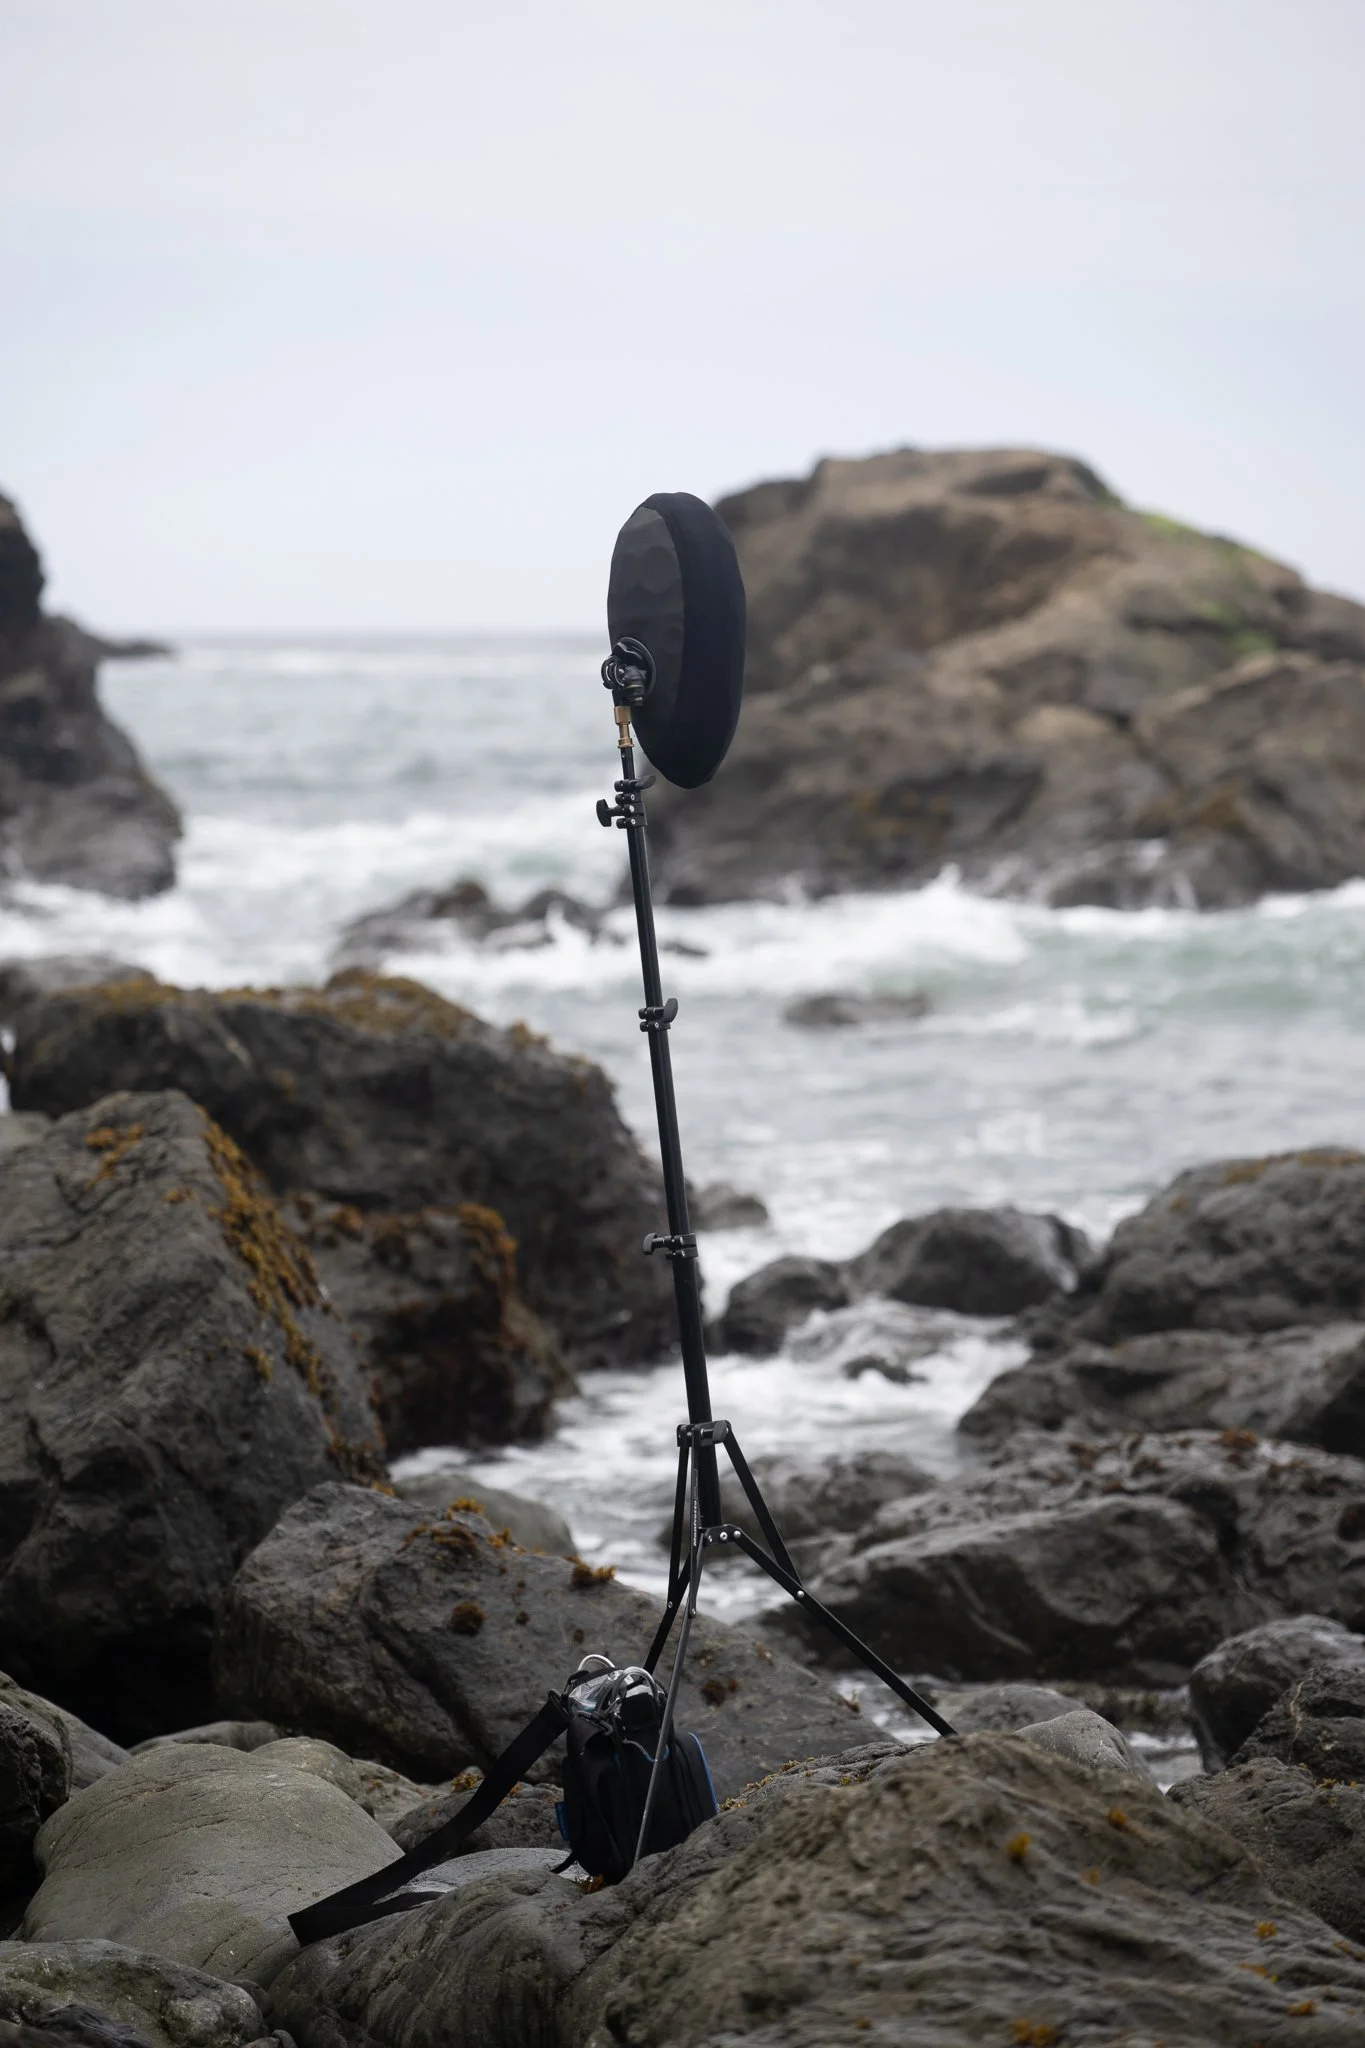
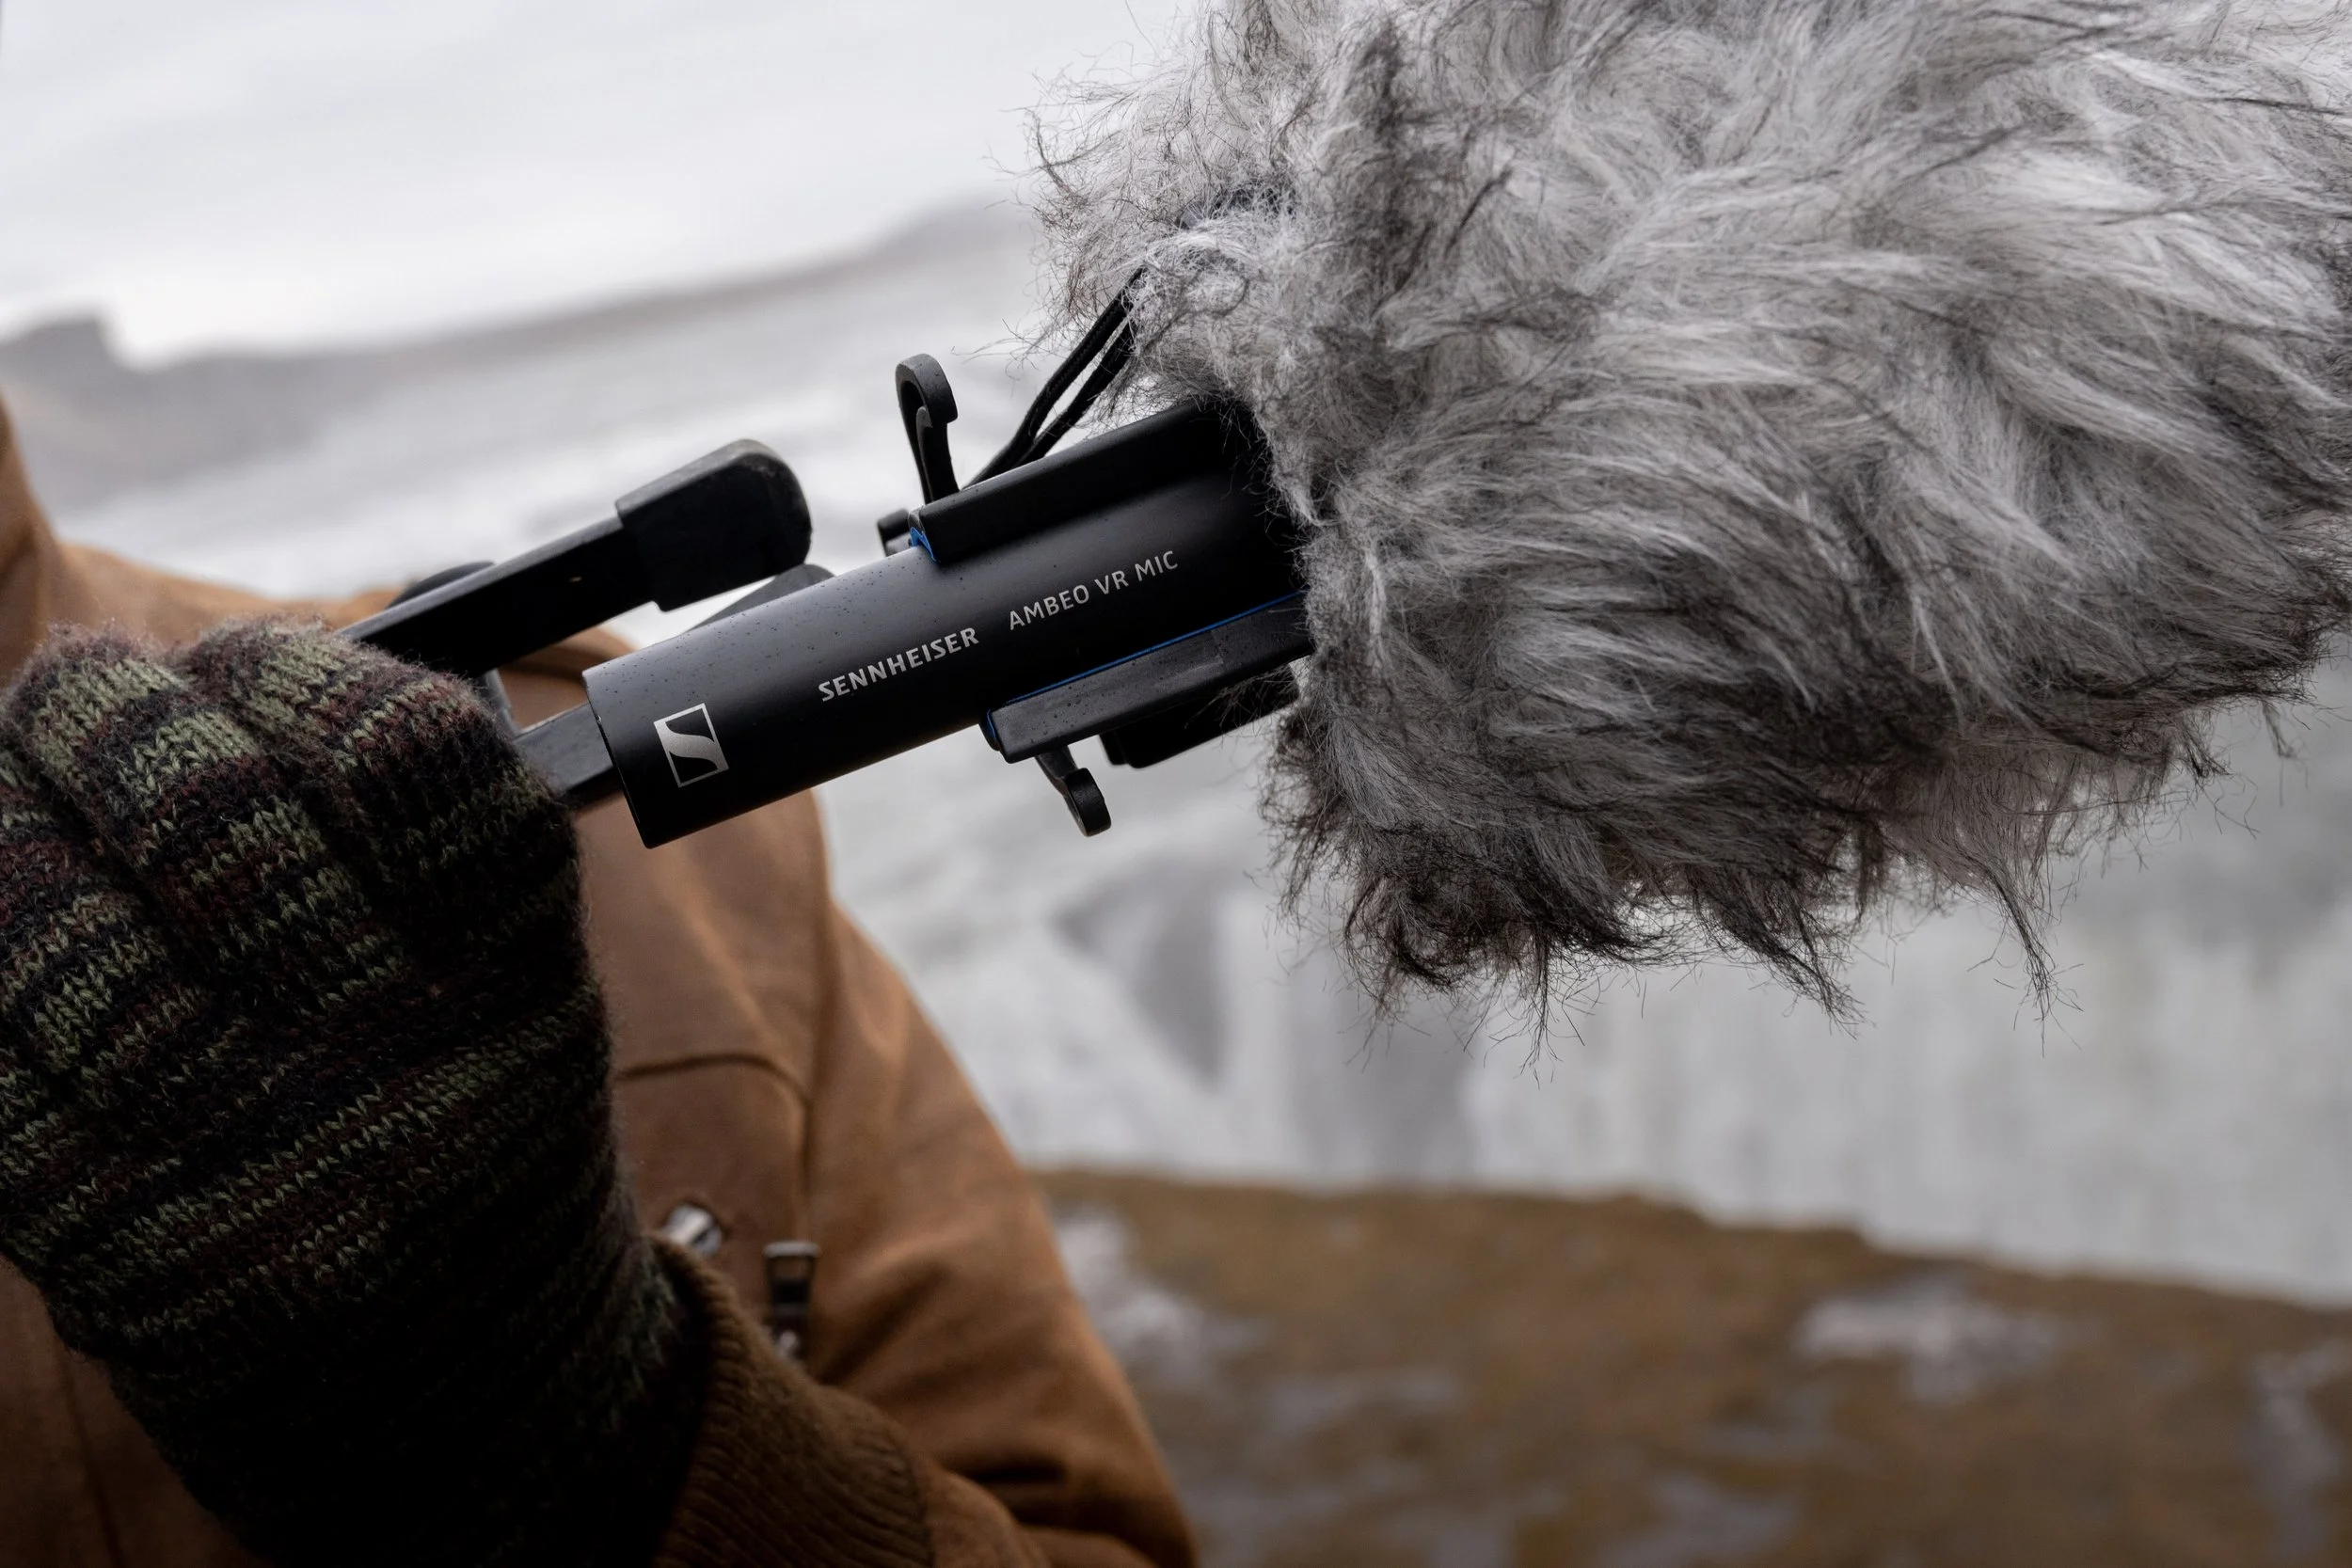
This is the big one! Sennheiser microphones are unmatched when it comes to harsh conditions. We’ve exposed our trusty AMBEO to some incredibly dangerous conditions over the years.  From the Florida Everglades in the summer to northern Iceland in a blizzard to literally being dumped on by a waterfall in Australia, it has held up beyond all reasonable expectations, oftentimes stuffed in a backpack or hand-carried out in the elements. On a recent trip to Northern California, a rogue wave knocked the entire stand, mic and all, into the Pacific Ocean. And yet the AMBEO survives. It is the undisputed Die Hard John McClane of microphones.

Jason setting up an AMBEO with Cinela Wind Protection in Thorsmork, Iceland

Recommended Accessories

12-Pin Extension Cable - 3 meter

The 12-pin to 4x XLR fanout cable is a sensitive spot in the setup.  I find the fanout cable to be susceptible to a high amount of handling noise.  The best way to avoid this is keep the fanout completely within the sound bag, which means you will need a long enough 12-pin extension to connect to the mic, run down the stand, and into the bag.

Cinela Piani AMBEO Windshield Kit

This product was a game changer for us!  The wind noise reduction is unbelievable.  It handles near gale-force winds with ease.  We pushed it to its limits (and a little beyond) in Iceland and I was honestly amazed at where that limit is.  The shockmount is incredible and the connbox eliminates virtually all handling noise.  Pricey, but worth every bit.  Also, be sure to check out the Piani Kelly Rain Cover.  We confidently recorded behind waterfalls and exposed in the rain knowing that the mic would be protected and the sound quality would be preserved.

Sound Devices MixPre 6 II

The perfect companion for the AMBEO.  The sound quality is impeccable and the Ambisonics plugin makes recording as easy as possible.  Direct conversion to B-Format saves a ton of time in post.  Linking the gain for all four inputs ensures good imaging.  Binaural monitoring gives us the confidence we need in the field.  It doesn’t hurt that it’s also extremely tough.

Screenshot of select plugins for Ambisonics mastering

Some of the best tools for mastering Ambisonics

Mastering Ambisonics

I’ve read some complaints in message boards about first-order Ambisonic recordings' ability to form a stable, immersive, multichannel image.  I believe that with careful mastering it is possible to achieve excellent results!  I’m currently decoding 1OA recordings to 7.1.4 and loving it. However, utmost care must be taken in the mastering process. Here are some things I’ve worked out through hard-fought trial and error:

First rule of Ambisonics!

Make sure you are keeping track of whether your B-Format is set to FuMa or AmbiX. It’s very easy to get this wrong and it will make the immersive image fall apart if your plugins are set to receive the wrong input type. AmbiX seems to be the more widely used flavor of B-Format and most plugins will default to that BUT ALWAYS CHECK!

Upscaling

The Audio Brewers ab Upscaler plugin is pure magic. It can take a 1st Order Ambisonics recording from the AMBEO (or any other 1OA mic) and upscale it all the way up to 7th order! The gains in spatial resolution are astounding. As a rule, I am highly skeptical of anything that claims to enhance an existing recording but Alejandro at Audio Brewers has figured out a way to do it in a simply breathtaking manner. Lately, I’ve been going up to 3rd Order (anything more and the number of channels gets a bit unwieldy) before decoding to my desired monitoring format. Just be sure to do any EQ or other processing BEFORE the Upscaler exponentially increases the number of channels!

Decoding

I use Audio Brewers ab HOA Decoder for decoding B-Format down to stereo, 5.1 or even 7.1.4. It is an amazing tool, but there are some important things to consider.  First, be sure to monitor in whatever format you are decoding to.  This will require that you do separate passes for the 7.1.4, 5.1 and 2.0 versions.  Do not assume that the settings for one decode will work for the other.  They often don’t!  Next, be sure to rotate the image all the way around to make sure you’re achieving balance and focus.  Despite my best efforts at mic setup, I rarely use zero degrees for the optimal ‘viewing’ angle.  Finally, don’t be afraid to mess with the mic spacing angle, especially in the stereo render.  Don’t be dogmatic - sticking to tried and true stereo miking methods - the best sounding result may be something unexpected.

EQ

I use Fabfilter Pro-Q3 for EQ duties.  First, it supports multi-channel formats, which rules out many other EQ plugins (however, it will not support 1OA except in multi-mono mode - please fix that Fabfilter!).  Next, it is a phase linear EQ, so it won’t mess with the time alignment of the 4 channels - very important if you want to preserve that immersiveness!  Finally, it has a dynamic EQ function which is essential.  I like to use a low shelf EQ set to dynamic mode to take care of intermittent bursts of low energy (like in wind or wave recordings) without sucking all the low end power out of the rest of the recording.  AMBEO-specific tip:  I find that the AMBEO has some buildup in the mid-500Hz range.  I like to scoop out 3dB in this area to compensate.  Be sure to use a light touch and listen carefully.  If your EQ notch is too narrow or too deep some negative artifacts will be introduced.  Never apply EQ without good reason and be mindful of the how and why.

Noise Reduction

I use iZotope RX for light noise reduction.  Rule number one - never apply broadband noise reduction to an Ambisonic recording!  There’s no quicker way to add artifacts, chirps, swirliness - whatever you want to call it.  I limit my RX use to a few surgical functions when performing Ambisonic mastering.  First, Spectral Repair, set to a conservative setting, can remove unwanted birds, ticks, clicks, pops and so on.  Don’t expect it to completely remove every unwanted sound.  You may have to concede that an unwanted sound will remain slightly audible or you may need to cut around it.  Listen carefully and LOOK carefully.  If Spectral Repair is cutting a hole in your spectrum, discerning ears will notice!  I also use De-Plosive to take care of intense low-end energy.  Be sure to set the frequency threshold based on the source material.  Avoid the temptation to use De-Wind.  It’s designed to remove wind noise from voice recordings - not wind recordings!  It will leave musical artifacts all over the place near the cutoff frequency, which is tolerable in location dialog, but never in a nature recording!

Sennheiser AMBEO on location Mendocino County, CA

In Conclusion

The Sennheiser AMBEO is a workhorse. Ambisonics recordings are underrated. Mic drop (don’t worry, it won’t break).

Check out our immersive ambience libraries or hire us for your next field recording expedition.

Should I Record My Sound Effects in Stereo? A Rigorous Assessment In Six Questions

Jason setting up a pair of Sennheiser 8040s on Hurricane Ridge, Washington State, USA.

The answer, of course, is “it depends”. Here are a few questions to consider before breaking out the stereo pair:

Is the recording intended to capture movement?

It is perfectly reasonable to record a car pass or a bullet whiz by in stereo. The movement is crucial to the sound and mono would fail to capture the essence of it. Of course, mono sounds can always be panned to approximate that movement.

Is the recording meant to be immersive or evocative of an environment?

Ambience just wouldn’t be ambience without stereo cues. In my opinion, backgrounds should be at least stereo and maybe even surround or immersive.

Is the space surrounding the sound important?

Take gunshots for instance. The sonic effect of the space on the gunshot is exaggerated due to the shear amount of energy exciting the space. It’s immediately apparent if a gunshot was recorded in a small interior, large interior, or exterior. Spatial timing cues really help to put the sound in the right space.

Is the sound larger than life or non-diegetic?

Something like a braam, stinger, riser or jump scare should feel large and powerful. Stereo excels at that.

How wide should the sound really be?

Consider the end user. I frequently mix on a theatrical Dub Stage where the front left and right speakers are about 30 feet apart. Stereo sounds that shouldn’t be in stereo stick out because they feel unnaturally wide and by extension, unnaturally close.

Imagine the sound of a laptop closing (I don’t know…that’s what’s right in front of me). For that sound to justify itself being 30 feet wide at the mix position, the camera angle would need to be an extreme closeup. Let’s do some simple math (the only kind I can do):

The mix position is 40’ away from the speakers, which are 30’ apart from one another. That’s a 1.333:1 ratio. So, if the laptop is one foot wide in real life that means I’d have to have my head 1.333 feet from the laptop to match the same audio perspective. If the image on the screen matches that perspective then it MIGHT make sense for the sound to be in stereo, but even that’s a stretch. Odds are, the perspective on the screen is much wider than that, so the sound should almost certainly be recorded in mono.

Will my recording be mono compatible?

In the above example, I may elect to do one of two things. I could drop a channel (I.e. simply omit either the right or the left channel). Or, I could sum it to mono. Some stereo mic techniques sum to mono reasonably well, XY for example. Others, like spaced pair, may cause problems.

Weird Stereo

Wrapping up

We love stereo! Personally, there’s no mic setup I prefer more than our pair of Schoeps MK41s in ORTF. But, when recording library content not everything should be presented in stereo. Ask yourself these questions. If the sound doesn’t hold up to the scrutiny, mono may be the better option. More channels does not necessarily equal more production value!

Don’t Fear the LFE - A Practical Guide to Using the LFE Channel for Music Mixers

Hello Dolby Atmos music engineers! Welcome to the world of immersive audio! We post mixers have been here for a while, now. We know you’re excited to use all the new toys at your disposal. Here are some tips from the film department to make the most of the LFE channel in Pro Tools.

First and most important tip - do not use the LFE send control in the Pro Tools Panner. It has never worked correctly and likely never will!

A screenshot of the Pro Tools Panner and LFE Send Control.

LFE Send in the Pro Tools Panner

So what’s wrong with the Pro Tools Panner? It sends the audio to the LFE channel, right? Yes it does. Here’s a simple setup where I have a mono audio track playing pink noise. That track feeds into a 7.1.4 aux that goes to the speakers. You can see in the video that the signal is being sent into the LFE channel when I turn up the LFE control. So far, so good.

But there’s a problem - it’s simply sending a copy of the pink noise into the LFE. Here’s a quick illustration. I added a mono audio track set up to record just the LFE subpath of the 7.1.4 aux from earlier. When I record onto that track and then solo it, you still hear full frequency pink noise.


What’s so bad about that? Well, a couple of things:

Bass Management

In most music Atmos setups, the subwoofer is pulling double duty. It’s getting the content of the LFE channel but it’s also doing bass management for the other speakers. It helps to keep in mind that the subwoofer and the LFE are not the same thing. The subwoofer is a speaker and it gets fed from two sources, the bass management settings in the Dolby Renderer or your monitor controller, plus whatever you elect to send to the LFE channel.

So let’s say you have a kick drum you want to send to the LFE. That kick is panned to the front left and right speakers (phantom center). Being a kick drum, a lot of the energy is already going to the subwoofer because of bass management. Now, if you turn up the Pro Tools LFE control it sends a copy to the sub. This results in the same sound, just twice as loud (assuming the LFE send is set to unity, but you get the idea). Additionally, if your room is not setup carefully and the speakers have not been phase aligned, you may have phase cancellation and actually make the kick LOWER in the mix!

No Filter

The Pro Tools LFE send control does not filter the source audio before it hits the subwoofer. It’s relying on the crossover in your subwoofer to low pass. This could lead to inconsistent results as different subwoofers may have different crossover settings. Dolby recommends that all LFE content be low pass filtered at 120Hz, preferably with a phase linear-capable plugin. They also recommend a hi pass filter at 20Hz to clean up any infrasonic mess. Unfortunately, there’s no way to insert a filter on the Pro Tools LFE send.

The Solution

With that in mind, here’s the fix that post mixers have been using for years.

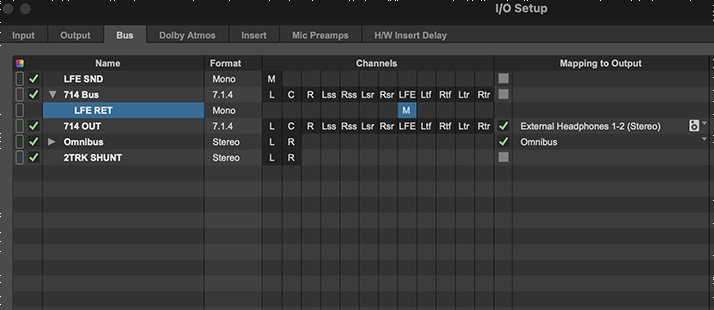
First go to the I/O Setup and make a mono bus called ‘LFE SEND’.

A screenshot of Pro Tools I/O Setup illustrating the LFE Send

Making a mono bus called ‘LFE Send’ in Pro Tools

Still in the I/O Setup, make a mono subpath of your 7.1.4 bus, name it ‘LFE RETURN’ and make sure it is routed to the LFE channel.

A screenshot of Pro Tools I/O Setup illustrating the LFE Return.

Making a mono subpath called ‘LFE Return’ in Pro Tools

Then, add the ‘LFE SEND’ you created to any track that you may want to send to the LFE. Leave the fader down for now and you can automate it later.

A screenshot of Pro Tools illustrating a track with an LFE Send on it.

Adding the LFE Send to a track in Pro Tools

Next, make a new mono aux track in Pro Tools and name it ‘LFE RETURN’. It will get its input from the ‘LFE SEND’ bus and it will output to the ‘LFE RETURN’ subpath.

A screenshot of the Pro Tools Edit Window illustrating the LFE Return.

Creating the LFE Return Aux Track in Pro Tools

Finally, insert the following plugins onto the LFE RETURN aux track:

Filter

In this case, FabFilter Pro-Q 3 with a high pass set to 20Hz and a low pass set to 120Hz. Make sure it’s in linear phase mode. Other options include iZotope Neutron.

A screenshot of Fabfilter Pro-Q3 illustrating the proper settings for an LFE return.

Fabfilter Pro-Q3 settings

Subharmonic Generator

In this case Avid Pro Subharmonic Generator set to 100% wet. This ensures that the original signal is completely transformed. We will only hear the artificially generated subharmonics. Adjust the input controls on the left of the plugin window to the frequency range that best suits the source material. You’ll have to toggle between while listening to find out what works best. Other subharmonic options include Cargo Cult Subquake and Waves LoAir.

A screenshot of Avid Pro Subharmonic illustrating the proper settings for an LFE return.

Avid Pro Subharmonic settings

Limiter

In this case Avid Pro Limiter, but any limiter will do. This is just to keep the LFE channel from clipping if you get over zealous with the send level. Netflix recommends a limiter ceiling of -2.3dB. That’s for film content, but it’s something to aim for.

A screenshot of Avid Pro Compressor illustrating the proper settings for an LFE return.

Avid Pro Limiter settings

Now, we have a properly derived LFE channel! Simply turn up the aux send level to taste.

An added benefit - managing the LFE this way makes it Bed/Object agnostic. Using the Pro Tools Panner will only work if the track is assigned to the bed.

One more tip - LFE stands for ‘Low Frequency Effect’. That means it’s best used as an effect. Sure, you can turn up the send a little to give your instruments some extra weight, but it’s best reserved for particular moments you want to accentuate. A sub drop at a transition, for example. Or to beef up the chorus. Or whenever you want the song to be even bigger. In movies, we will use the LFE to accentuate explosions, gunshots, particularly heavy punches - stuff like that.

OK, now get out there and don’t be afraid to use the LFE!

Finally, do you use a different DAW that handles the LFE better than Pro Tools? Let us know!